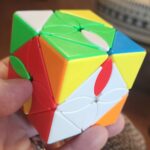
Archive for the Cubing Category

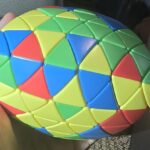
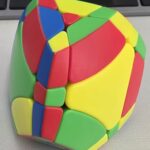
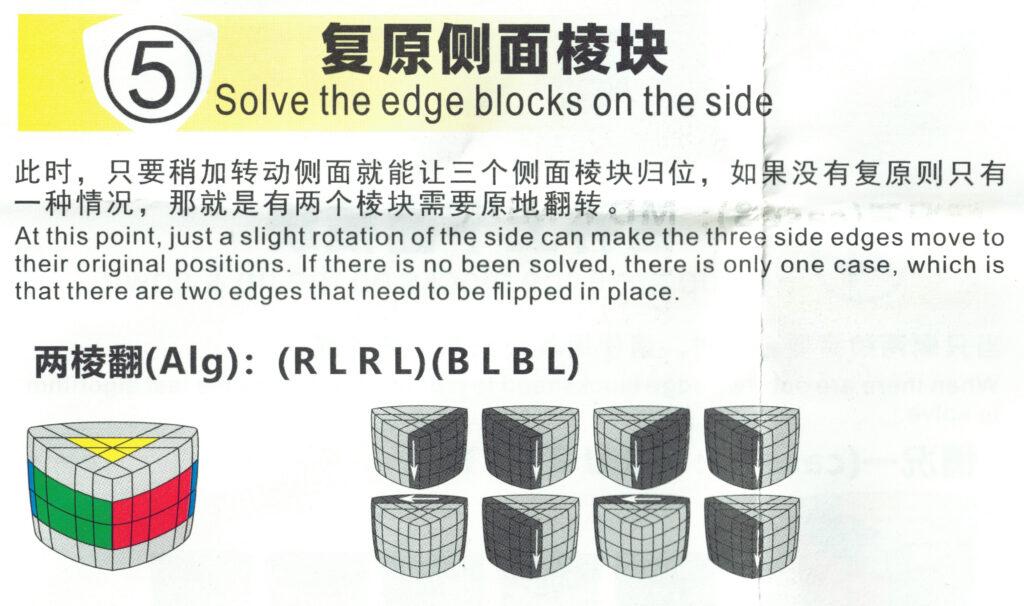
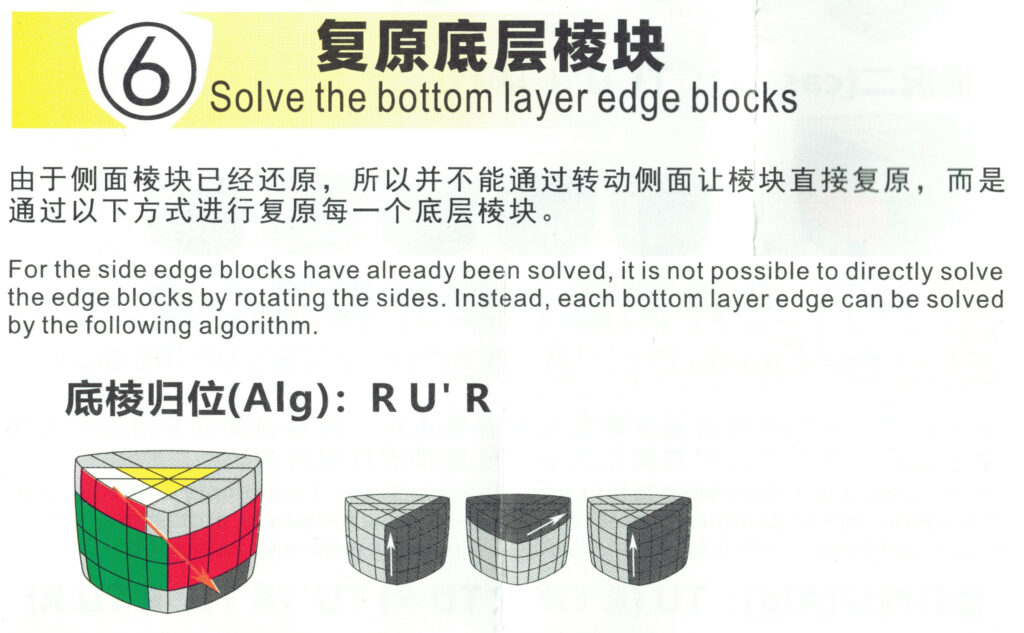
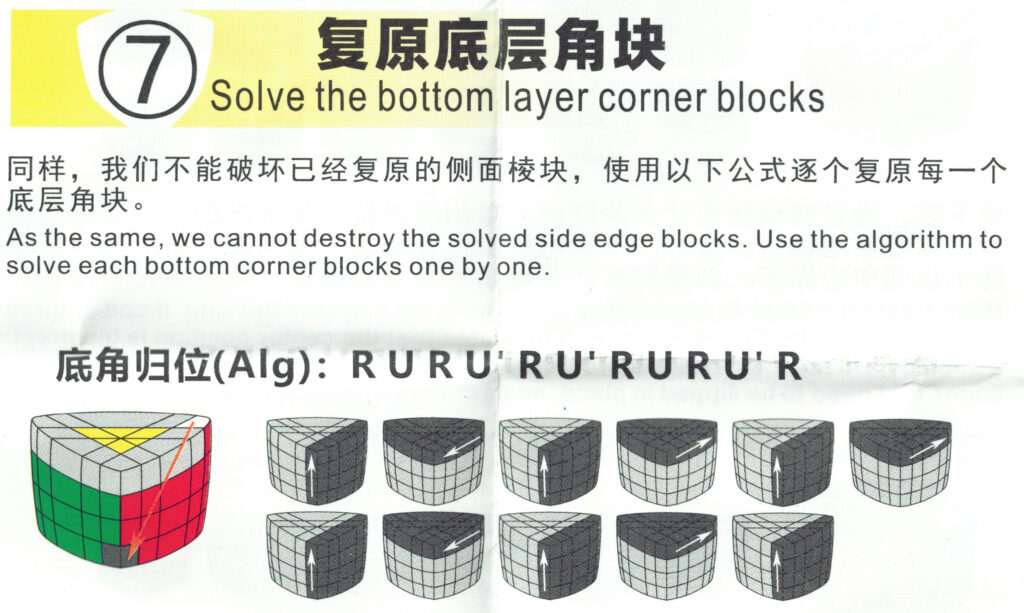
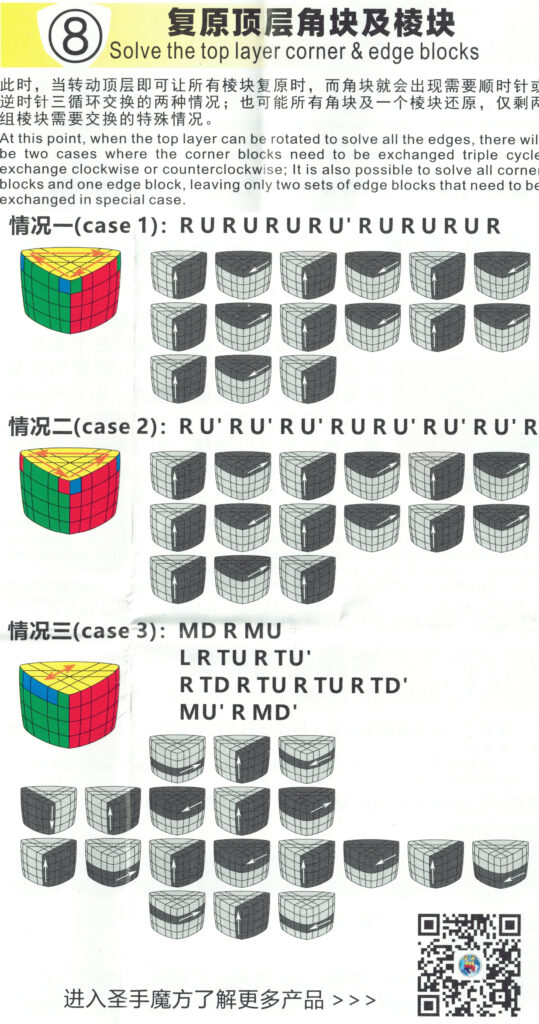
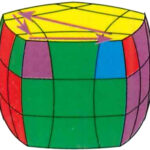
Shengshou Pentahedron Guide

Posted in Algorithms, Blog, Cubing on June 9, 2024 by slateman

EDIT: I tried a different solution for the 2/3 layered renditions. This guide is not complete and it’s flawed.

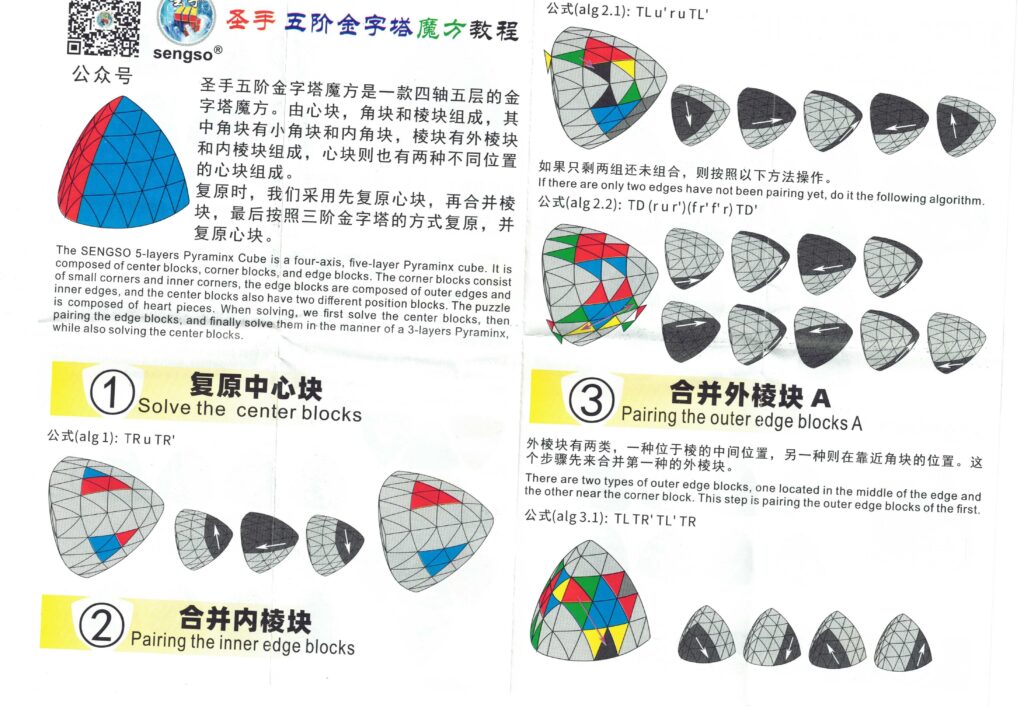
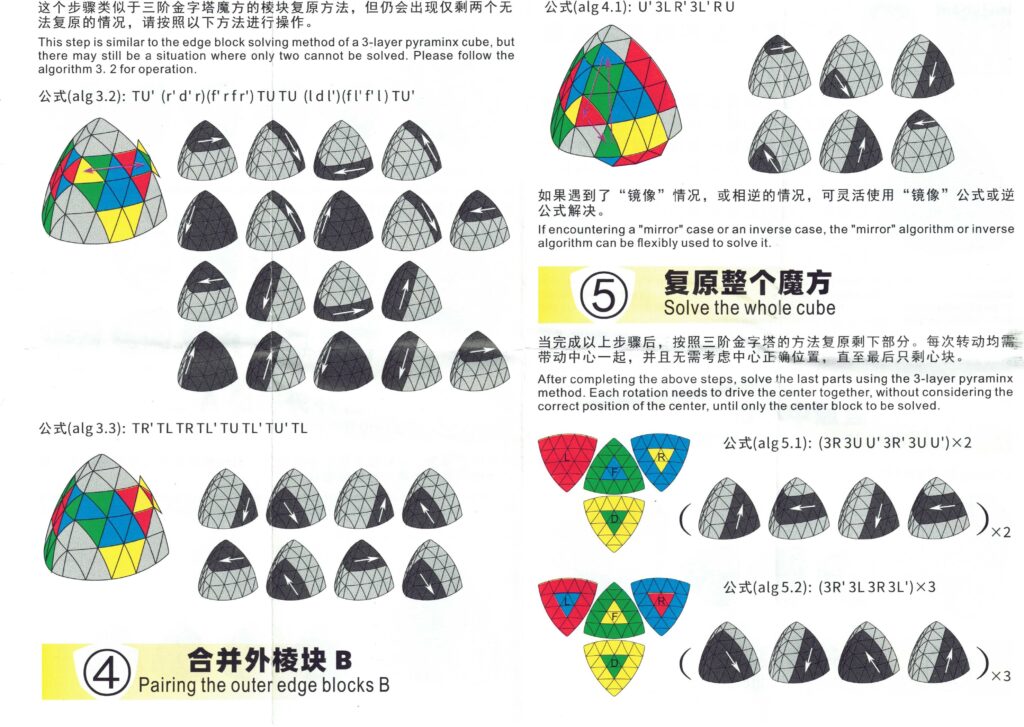
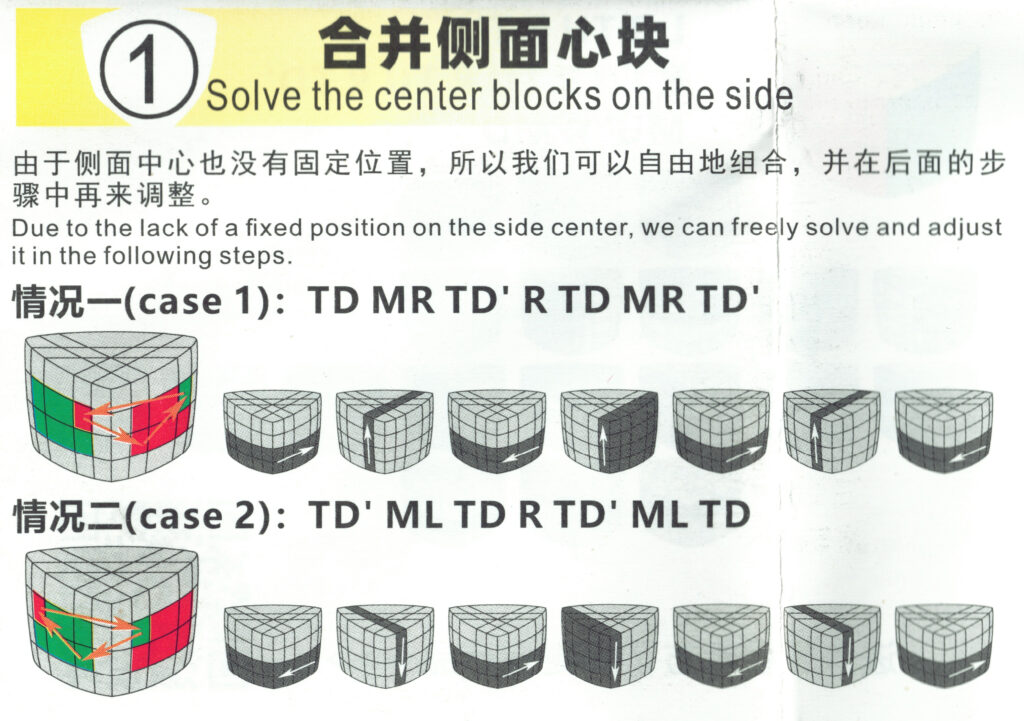
I got a 4 and 5-layer Pentahedron and opted to grab 2 and 3-layer versions. Here are some algorithms for the smallest version to help before I move on to the higher-order puzzles.

Step #1: Get White & Yellow Centers

This puzzle is red-white-green clockwise unlike a standard puzzle, so get that on white on the bottom and move on to the top.

If you have two swapped, keep the correctly-placed center on the left. With a triangle pointing at you.

F/ U / F / D’ / F /

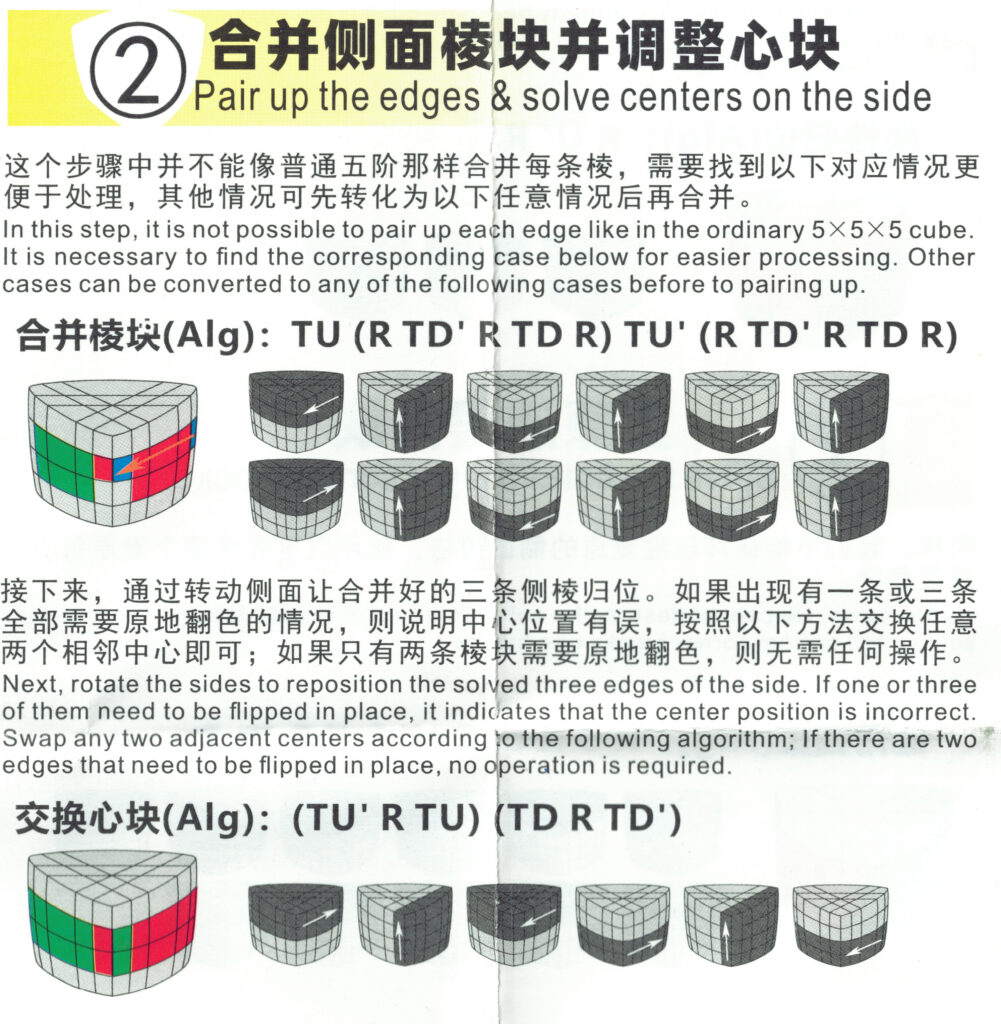
Step #2: Finish white Layer

Put the proper white piece above its correct location and do the standard 3x3x2 algorithm. R / U / R / U’ / R. This is an easy, familiar step.

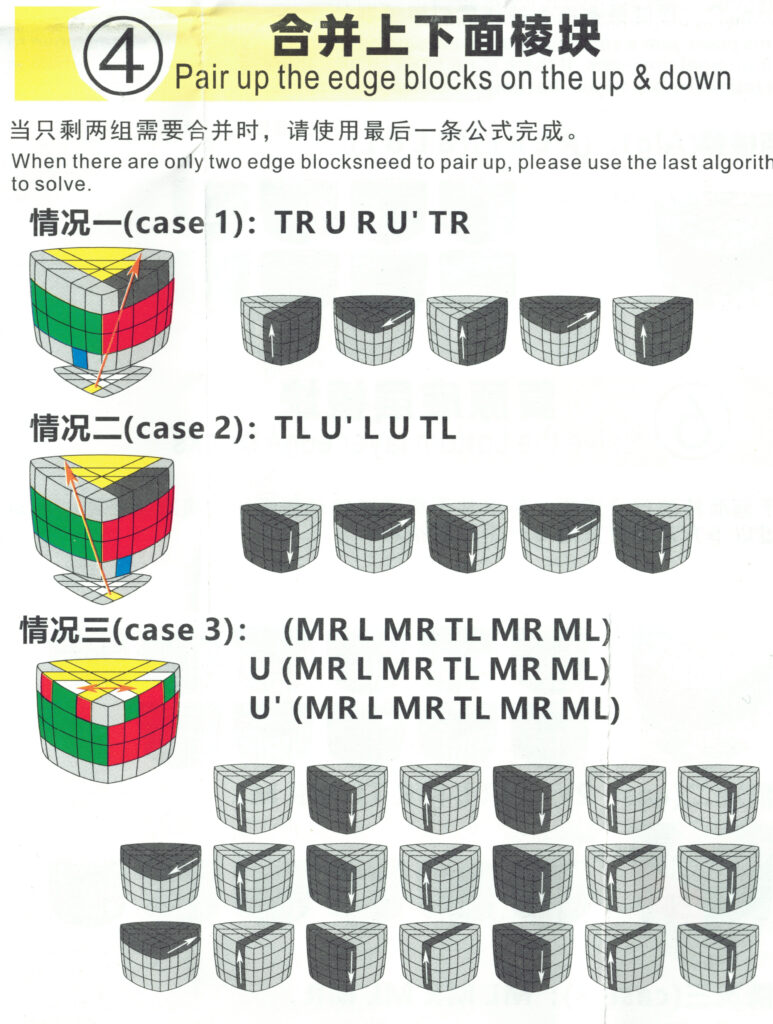
Step #3: Last-Layer: Corners

We’re going to start our last layer with corners first. If you need to swap two of these, put the correctly-placed corner triangle pointing at you and:

R / F / U /
R / F / U / R / F

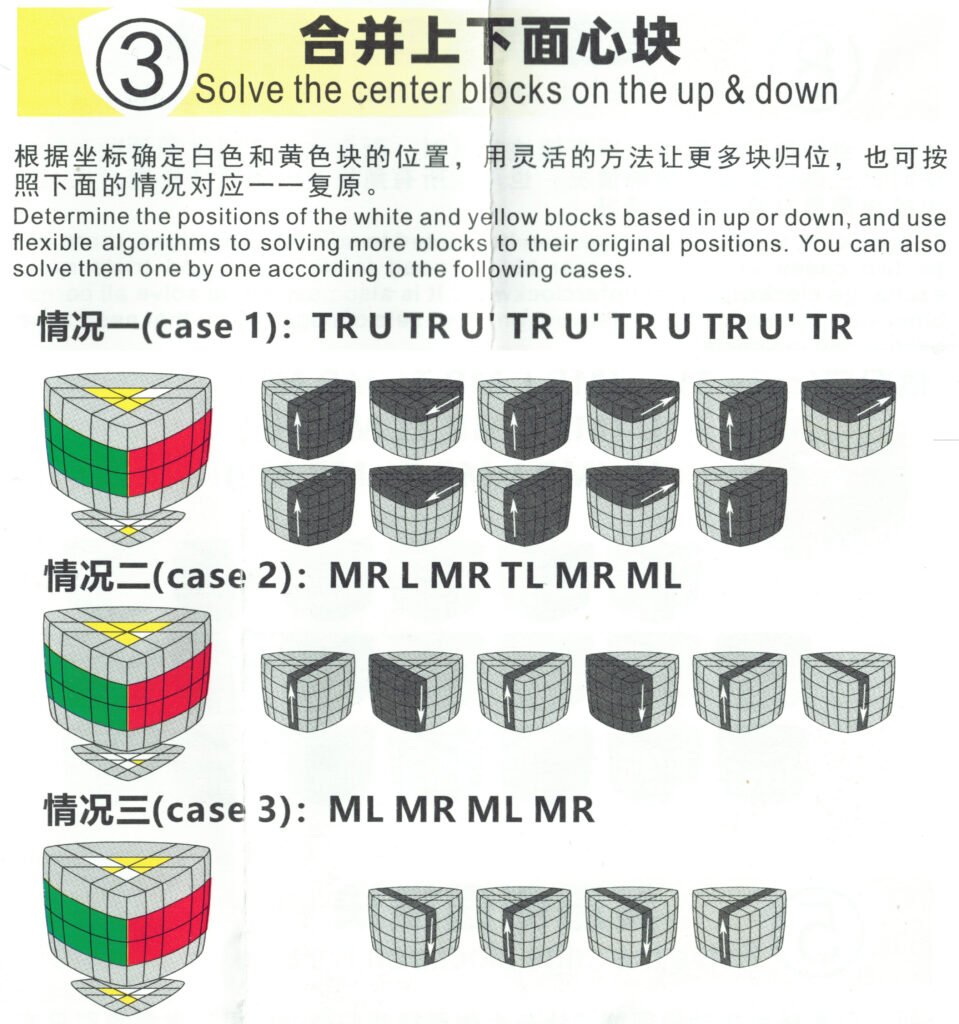
Step #4: Last-Layer Centers

If you end up with a pair of incorrectly-positioned centers, keep the solved side on your right and perform this lengthy algoritm.

L / R / U / R /
U’ / R / D / R /
U / R / U / R

Need to verify this all. Then I’m moving to the bigger puzzles.

Helicopter Dodecahedron Algorithms

Posted in Algorithms, Blog, Cubing on May 27, 2024 by slateman

At this stage of the game, more than 10 years into cubing, I collect based on looks and solves together. Some puzzles look great but I just know that a solve is a lot of work or that it’s not particularly fun. While helicopter puzzles look great, they aren’t often too difficult and so I figured I’d take the plunge with this one as part of a very-large purchase. The solve isn’t too bad, but I did need help on the later steps. Enter Twisty Puzzling’s tutorial. And here are the steps to solve this guy!

WIP: More To Come!

Step One: Solve the bottom face

This was intuitive and I got my white face situated pretty easily. Moving things around isn’t hard when you have plenty of free space to deposit things temporarily. This step situates the white face and the entire ‘layer’ above it all the way up to the long, edge pieces of each helicopter wing.

Step Two: Start building the bottom middle layer

This isn’t much of a layer, but here you’re going to want to maneuver these numbered pieces into place. I’ve numbered them in this photo in order of sequence. Some of these are intuitive, but keep moving around to the right of the puzzle. If you need to rotate one of the three-colored centers, just see the orientation on the top layer. If it needs to rotate clockwise, then spin it around the top layer counter-clockwise and vice versa. Move things out of the way as necessary here and as you get to the very end, use intuition to figure out the final pieces.

Step Three: Build the top middle layer

Now that you have the second layer done, your focus is the top-middle layer. This will include the higher three-colored pieces and the two petals to the left and right of them. You can do the centers (those three-colored pieces) first or build these all on the top layer and bring them down. So far, nothing too difficult.

Step Four: Position Petals

After orienting the lengthy center slices, now you move the petals around in a convenient three-cycle. In this photo, the pink on the right will swap with the off-white on top which will swap with the grey to the far left. The standard up, up, down, down here is intuitive and can be used to align all these nicely and swiftly.

Step Five: Position Corners

This three-cycle will move corners counter-clockwise from left to center to right. You will begin by moving the top-left piece to the left section, performing the algorithm and then undoing.

So, if we go left, front, left, front – then swap the right piece down – then front, left, front, left and fix the right.

I assume there’s a mirror version of this, but for now, that’ll do it. L / F / L / F / R / F / L / F / L / R is your three-cycle.

Step Six: Orient Corners

Unicorn Cube Tutorial

Posted in Algorithms, Blog, Cubing on September 9, 2023 by slateman

For the first half, I’m using Super Antonio Vivaldi’s tutorial as my basis. If I get stuck in my descriptions, just go watch the video. The later steps were guided by Bearded cubing 101’s guide.

Step 1: Align All Corners
This is the obvious first step. You can easily set up two or so, but as it goes on, it can get tricky. Once you have an edge piece flipped, hold the cube face on to yourself. Do a F2 turn to move the top edge piece down, swap it left or right to a piece that works (now on the bottom), do another F2 spin and your top layer should be complete.

I place the good side on the bottom now. To do middle layer edges, you can use a 3×3 algorithm to bring a piece from the top down. Or, you could just swap a front-right edge with a top-layer edge by bringing it up, swapping out and bringing the new piece down.

For the last layer, see how many incorrectly-placed pieces you have. If it’s all, do a standard 3×3 suni alg (r, u, r’, u, r, u2, r’). Now ideally you’ll have two in places/lined up and two not. Place those incorrectly-aligned edges on F and R and use a 3x3x2 edge-swap algorithm (R2, U, R2, U, R2, U2, R2, U2, R2, U, R2, U’, R2)

Sometimes I’ll get a bar of lined-up pieces instead of adjacent. In this situation, I do a l, u’, r’, u, l’, u to make them adjacent. Then I do the edge-swap alg above.

Step 2: Reduce Center
Find one center that you want to match up. Then flip the puzzle making this your bottom. Then we do the middle layers. You’ll use the top layer here as your free face to move around the pieces as you need. I think this is mostly intuitive, just don’t destroy your other middle-layer, correctly-placed pieces. If you get stuck, don’t forget: I can take my left (or right) center corner into my front face, then take a piece from the top and swing it down to the front, thus returning that newly-misplaced center corner back. There’s another method of doing this, but I think my solution will work fine.

Step 3: Reduce Edges
This will work something like 4×4 edge reduction. We are going to maintain one corner angular integrity and not worry about the rest of the puzzle. I usually choose the front-right corner. Your goal here is to slot an opposite piece (same colors – but a small/big to a big/small), do the angle turn, then restore. Ideally, when restoring, you’ll move another, properly-colored piece into place.

The trick here is maneuvering these other pieces into position while retaining the angular cut in the front-right spot. In addition, you’ve got to make sure the piece is slotted properly – i.e. with the big chunk on the left and the small to the right.

Step 4: Solve as a 3×3
The final step is intuitive. You may have to rotate centers, you may get adjacent edges flipped, but it should work out fine unless you get the dreaded one-corner-twisted parity. I haven’t even looked into that solution.

Another New Megaminx Record! WOW!

Posted in Best / Worst, Blog, Cubing, Cubing Records on July 2, 2022 by slateman

As stated previously, I’m loving my new magnetic Megaminx and this morning, a quiet Saturday with a sleeping puppy by my feet, I figured I’d do a quick speedrun. It was about 1:10 before I got my first two layers done – mostly par for the course – but my middle edges/corner matching was pretty solid. This puzzle’s bright faces make it easy to identify and so for the first time, I’ve been looking ahead. A quick slip-up on my penultimate layer and some fidgeting permuting centers (my weakest step) made things a bit slow, but I’ve become much more adept at orienting corners and placing them. The end result? A staggering one-minute improvement and a mind-boggling 4:16 solve! I was blown away!

New Megaminx Record!

Posted in Best / Worst, Blog, Cubing, Cubing Records on July 1, 2022 by slateman

I was really impressed with my latest Megaminx record – getting my time down to 7:21 and then an even 6:00. In light of having this kick-ass new Gan 3×3, I realized just how good a magnetic speed cube can be. Next up really should be a 2×2 or a Pyraminx, but neither are really FUN puzzles. The Megaminx, however, it an entertaining solve and with that, my order was set: YJ YuHu V2M. I lubed it up and immediately noticed just how fast and precise it was. One sub-seven-minute solve (would’ve been my record just a few months ago) was followed by a slamming sub-5:30! I was impressed by just how good this puzzle was! One more sub-6 and then I got a 5:18! FORTY seconds faster than my old record!

That evening, I revisited the puzzle, getting several close times (in the 5:20 – 5:30 range). Whether a sub-five-minute solve is possible, I’m not sure, but this puzzle is simply wonderful and it’s still just so much fun revisiting things like this and breaking records. Of course, I’m probably getting close to my limits on them all, but at 46 years old, I’m still enjoying it! So psyched!

THREE New Cubing Records: May 2022!

Posted in Best / Worst, Blog, Cubing, Cubing Records on June 24, 2022 by slateman


The end of the school year, covid, surgeries and home renovations delayed this post, but it’s an exciting one, if I might say so myself. Moving backwards, in late April a student in my Spanish 2 class (one with a PB of around 17 seconds) brought in her Gan 3×3. Over the past 11 years of cubing, I’ve regularly updated my main – maybe once every other year or so, but my record has stood since barely dropping a half a second from it in May of 2018. This new puzzle was unlike any other I’d tried before. The magnets were snappy, turns felt super responsive and it glided like butter. I was on a mission.

Upon purchasing a Gan 356M, their middle-of-the-line budget model, I realized it was just way too loose. I should’ve opted for the model with extra GES nuts to help with tension, but I already felt badly spending $30 on another 3×3!!! When I got the cube finally tensioned how I wanted it, I couldn’t believe just how wonderfully it turned. This is the best puzzle I’ve ever owned. To put things in perspective, I had accomplished three sub-30 second times in my prior decade of cubing. I accomplished the feat six times in a week with my Gan 356. My first, an astonishing 28.6 seconds shaved almost half a second off my time. I was elated. I saw it coming. My record broken – for the fourth time in a row in the month of May!

However, that wasn’t all. Two days later, I utterly shattered my record, trimming two full seconds off! The solve was magical. Three of the four cross whites already done so I could start planning my corners ahead, something I NEVER can do. Three middle layers were super fast and I could see ahead as I placed those pieces swiftly. On the top layer, I had an L and then had to swap two corners. This left me with a fully-solved yellow face. A quick three-cycle solved the puzzle in the fastest time EVER! 26.46 seconds! While I was at it, I broke all my average records: Averages of 3/5/12/50/100 all were decimated, with my average-of-3 being sub-30!

Unfortunately, future solves revealed that without a very lucky skip, I will never match or best that time. If I can’t get the second layer done by 15-17 seconds, it’s not even worth finishing. Once you hit that stage, a lot of the fun is sucked out of speedsolving. I’ve dabbled in F2L, but without memorizing all new algorithms, I don’t see it ever happening. With my 4×4 and 5×5 records at incredible times and with good cubes alongside of them, I genuinely wonder if my days of timing myself are over.

But then I wondered if I could give the Megaminx another swing. Upon getting a new puzzle for Christmas (which itself resulted in breaking a decade-old record), I figured why not try again? Solve #1 was close to the 7:21 record from January and solve #2 was…just remarkable! 6:00.77! I trimmed my record by 80 seconds!!! I got a lucky last layer and just missed a sub-6 by three-quarters of a second!

I’m happy these old bones still have some speed in them. Three records in one month – not bad for a 46-year-old!!!

Master Icosamate Algorithms

Posted in Algorithms, Blog, Cubing on May 8, 2022 by slateman

This puzzle is kicking my ass. Fortunately, our hero Super Antonio Vivaldi made a tutorial (including another video with algorithms and another on the regular Icosamate.)

Step One: Get Corners On One Face

This should be done intuitively. Use a beginner’s method to move/rotate these as you go on.

Step Two: Permute Last-Layer Corners

This is a challenge and will be the most time-consuming part of your solve. First, flip the puzzle over and remember your bottom-layer colors (it’s easy to get mixed up and forget, particularly after putting the puzzle down!) Now, you’re going to find one corner to use as a basis for figuring out what the top piece must be.

You will do a DDUU algorithm as expected. This swaps the top with the front center piece and it also swaps the back left and back right. Doing the algorithm a second time returns all to their proper spots. However, it will also rotate them.

Starting on the left side, this will spin those centers clockwise. Counter-clockwise is done starting on the right.

Usually you won’t have this all land perfectly. Remember some cheats: you can move up the front L & R pieces to the back L & R. Since those back ones will swap/rotate and the front won’t, it’s an easy way to move around which pieces you want.

If you’re stuck with a pair of adjacent ones, do the algorithm once. This swaps the top and the center. Then rotate the second wrong piece to the front and do the alg again. This is how you do a three-cycle. Make sure you do the DDUU on the right to start and then return with the left to ensure the back sides don’t get messed up.

Step Three: Rotate Last-Layer Corners

Get the top center rotated properly while keeping at least one corner oriented properly. You’ll do your DDUU until the top center is right (and you keep one aligned perfectly so you know which is which).

Now you’re going to get the remaining corners. You can have two or three out – never one. This is a beginner’s method approach using R’/D’/R/D. You’ll count how many turns you need. You will be looking for a multiple of five (to keep your top oriented correctly). You do your R’/D’/R/D until one corner is set. Then, using a last-layer method from a 3×3, keep the lower-right piece in place (it’s rotated wrong now). Keep doing the algorithm a total of five times (or multiple of five). If it’s not a multiple of five, that’s OK, now use the one incorrectly-rotated center as your center.

If you’re unlucky and get parity, you’ll find yourself with everything done and an incorrectly-oriented top center as stated above. In order to fix this, place your top center how it’s supposed to be. This will mess with the other five corners. *sigh*. Yup. Now using intuition, move around these pieces to get the top layer perfect.

I’m guessing here, but you’ll likely swap a top and a front – then turn the puzzle and perform the opposite algorithm (starting on left vs right). You’ll likely need to fix the piece you just put in place. Feel free to do so (clockwise or ccw).

If you get all those pieces put in properly, you’ll likely have a few corners which need rotations. Count how many you need: hopefully you’ll end up with five rotations and go back to the R’/D’/R/D to figure it all out.

Step Four: Match Edges

This three-cycle will swap edges. This will go red/green/blue clockwise if you start on the right. Like the Face Turning Octahedron algorithm, this will require you to bring one slice down, then do a D/D/U – return slice – D/U/U algorithm.

Starting on the left will rotate them clockwise (R/G/B). You will use a face with a V in front of you (like the blue/green shown here). If you bring the left (red) piece down, then you do Right down, left down, right up – return slice – right down, left up, right up.

If you start on the right (move yellow down to the blue), then your algorithm will go left down, right down, left up – return slice – left down, right up, left up.

Now…what to do when a pair are inevitably flipped upside down? OK, so get them adjacent like you’ve been doing. You’ll be flipping these, so hopefully these are your last two edges that need fixing. If they’re the blue and green here, use a dummy piece (yellow) as a start. Now, you’re going to want to flip the green piece. Do this by the following:

You’re going to be working with the lower-right corner (LR – the green triangle) and bottom layer. Turn LR’, then D, D, and return LR LR. This will flip the piece that was originally there.

Now, do your algorithm. Then undo your flip, now by LR’, LR’ D’, D’ and LR – the opposite of your prior flipping alg. Finally, do your step-four algorithm two more times. If you need guidance, check out SAV’s tutorial (with timestamp).

Step Five: Match Petals

This algorithm is the opposite of the step-four alg. Here, however, you will move up the M slice layer, perform three moves, return the M slice and then do three more. It’s almost exactly the opposite of the one above. I need time to get to this part.

Start by moving that M slice up to put the pink petal where the yellow is. Then, using the colored center as your basis, do a Right down (x2), left down (x2), right up (x2) then restore the M slice to its original spot and do a Right down (x2), left up (x2), right up (x2).

Update: A solid week of dedicated work resulted in a full solve. One of my proudest solves. Not sure how eager I am to mix this up again. :D

Rex Cube/Super Ivy Cube Algorithms

Posted in Algorithms, Blog, Cubing on May 7, 2022 by slateman

I bought a Rex Cube ages ago but never really enjoyed solving it. The puzzle itself felt like it was going to fall apart at any minute and upon solving it, I shelved it and hardly ever touched it again.

Last year I purchased a Super Ivy Cube and despite being the exact same puzzle in a sense, it’s a lot more fun and a much more solid. However, as usual, I forgot the final step and had to look it up. Thus, the usual tutorial/algorithms for my own personal reference.

Step One: Align All Edges

This is an intuitive step and is essentially solving a Dino Cube. You should be able to get all of these solved pretty easily.

Step Two: Move Centers

This is the standard up/up/down/down algorithm and I do this intuitively as well. I try to get three mismatched centers oriented around one corner to easily swap them. If they’re all in a line, I just try to solve one before moving on.

Step Three: Move Petals Around

This algorithm is the only reason for this post, really. This will swap petals on your front faces as seen here. You will start with Right up, left up, right down, left down, then turn the puzzle clockwise on the corner you’re looking at and reverse it. Left up, right up, left down, right down. This should flip those two sets of petals. Now, it’s just a matter of coordinating those swaps and you’re gold!

MF8 Regular Astrominx – New Puzzle!

Posted in Blog, Cubing on April 28, 2022 by slateman

New Puzzle! I finally added an icosahedron to round out the platonic solids.

New 6×6 & Megaminx Records!

Posted in Best / Worst, Blog, Cubing, Cubing Records on January 3, 2022 by slateman

I started cubing almost 11 years ago and in my early days, I was more focused on speed than I am now. However, while my collection is now more focused on diversity and uniqueness – I still like to dabble into speedsolving from time to time. With a new, Christmas boost to the collection – I’ve upgraded my 6×6 and Megaminx – the former, a terrible V-Cube and the latter broken in shipping. Due to these substatial updates, new efforts were made to break decade-old records and in each case, the personal bests fell swiftly.

My 6×6 record, residing at over 15 minutes, was shorn to 11:11: an improvement by over four minutes. The Megaminx took a pair of tries before it too tumbled. I only did this puzzle for speed a few times, and I don’t endeavor to break this record – a half-minute improvement – any time soon.

A pair of records brought into the current decade, now leaving but the 2×2 and Pyraminx as sole representatives of the 2010s. Oh, and the 3×3 but that’s OK. My full cubing records can be found here.