Image taken from this Speedcubing tutorial. Just need to memorize these last edge algorithms.

Image taken from this Speedcubing tutorial. Just need to memorize these last edge algorithms.
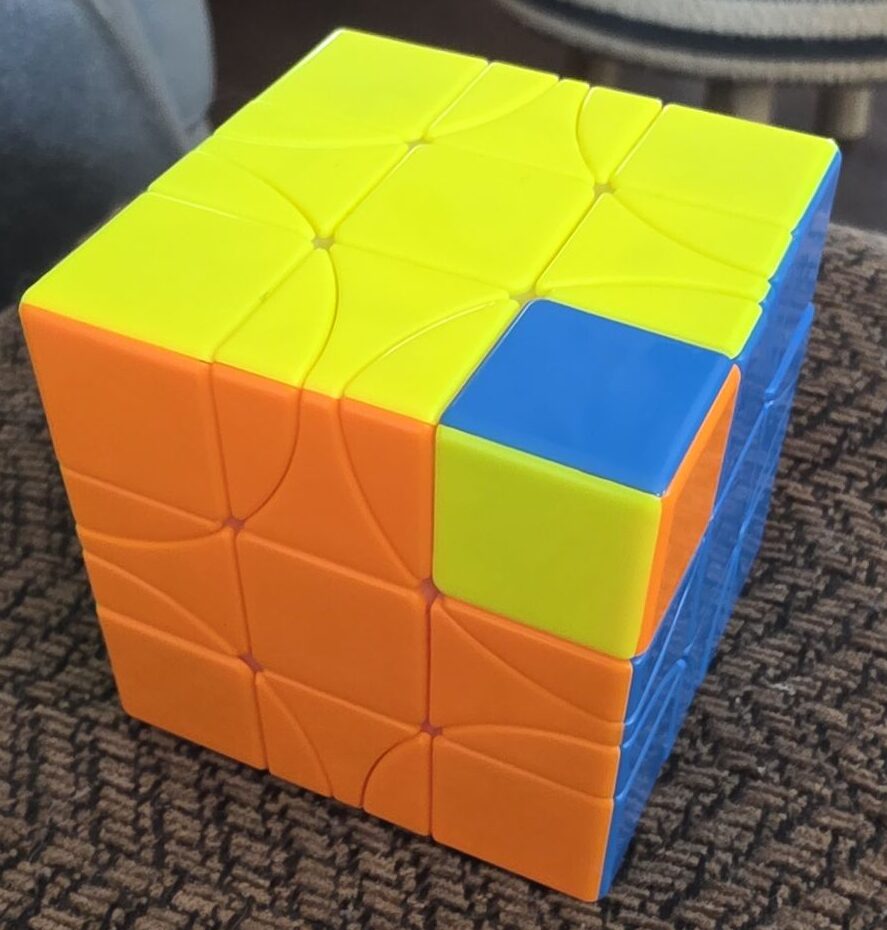 Quick and easy fix to the one-flipped-corner parity on this fun puzzle.
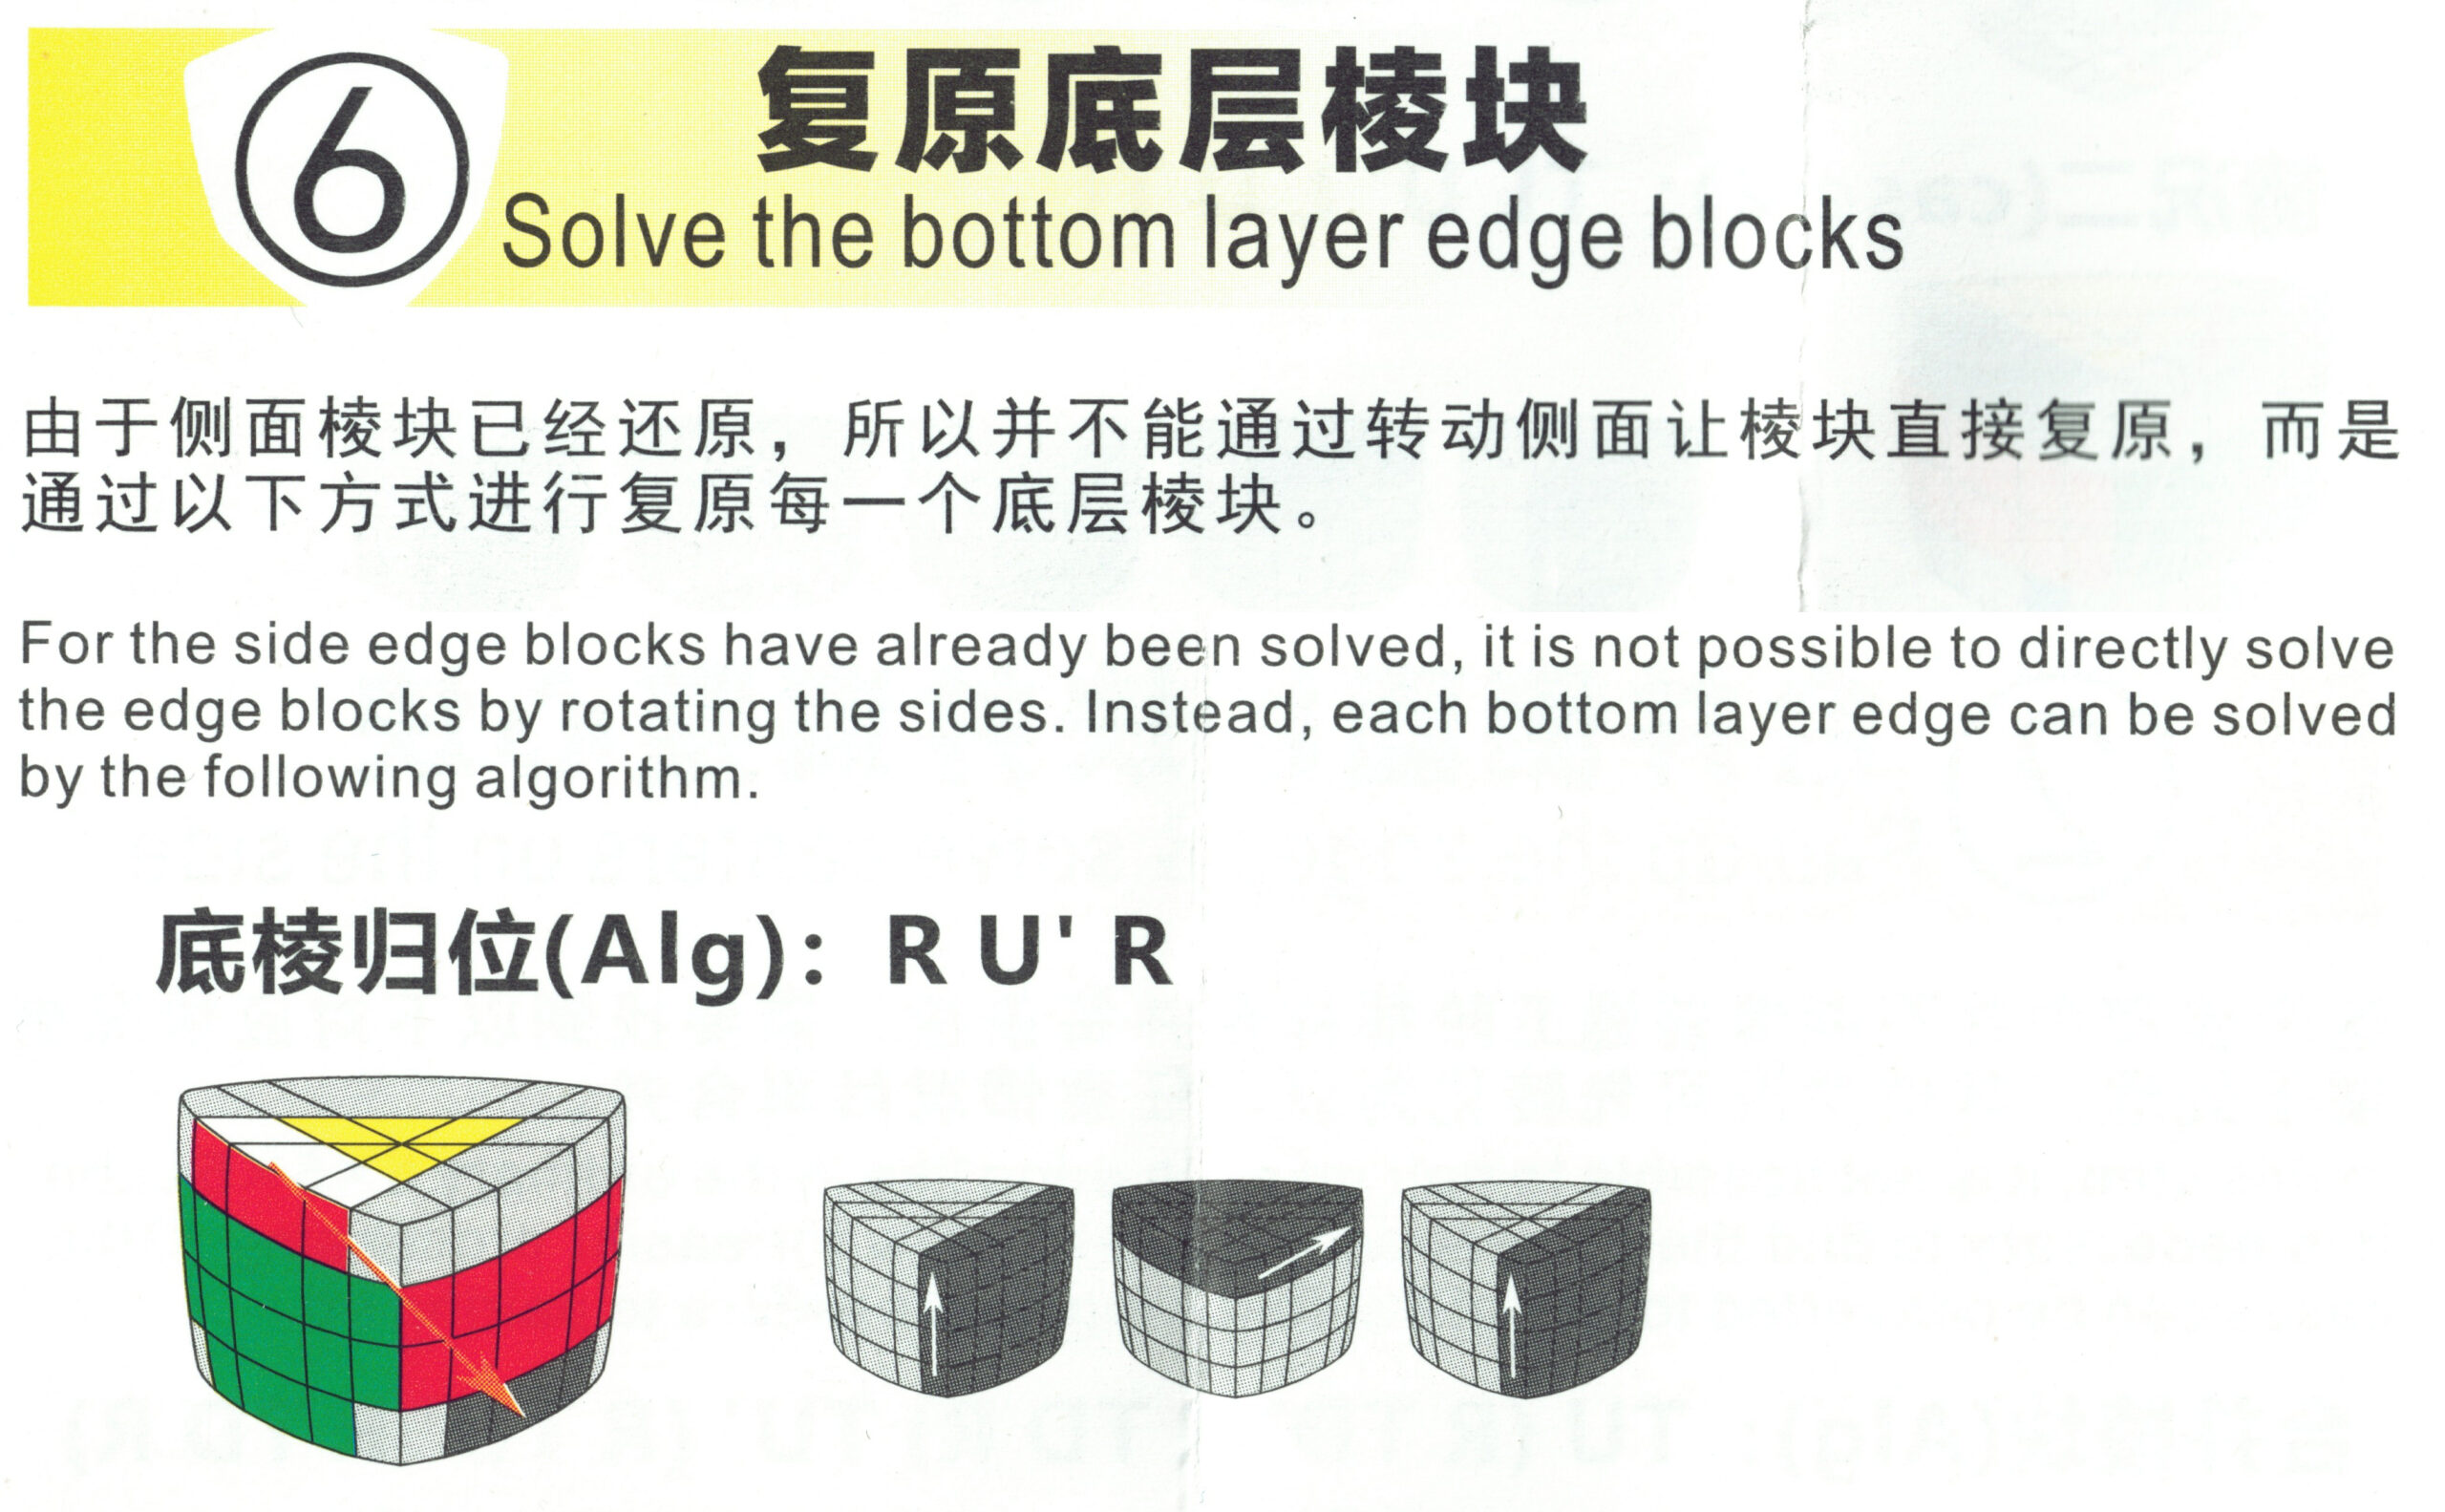
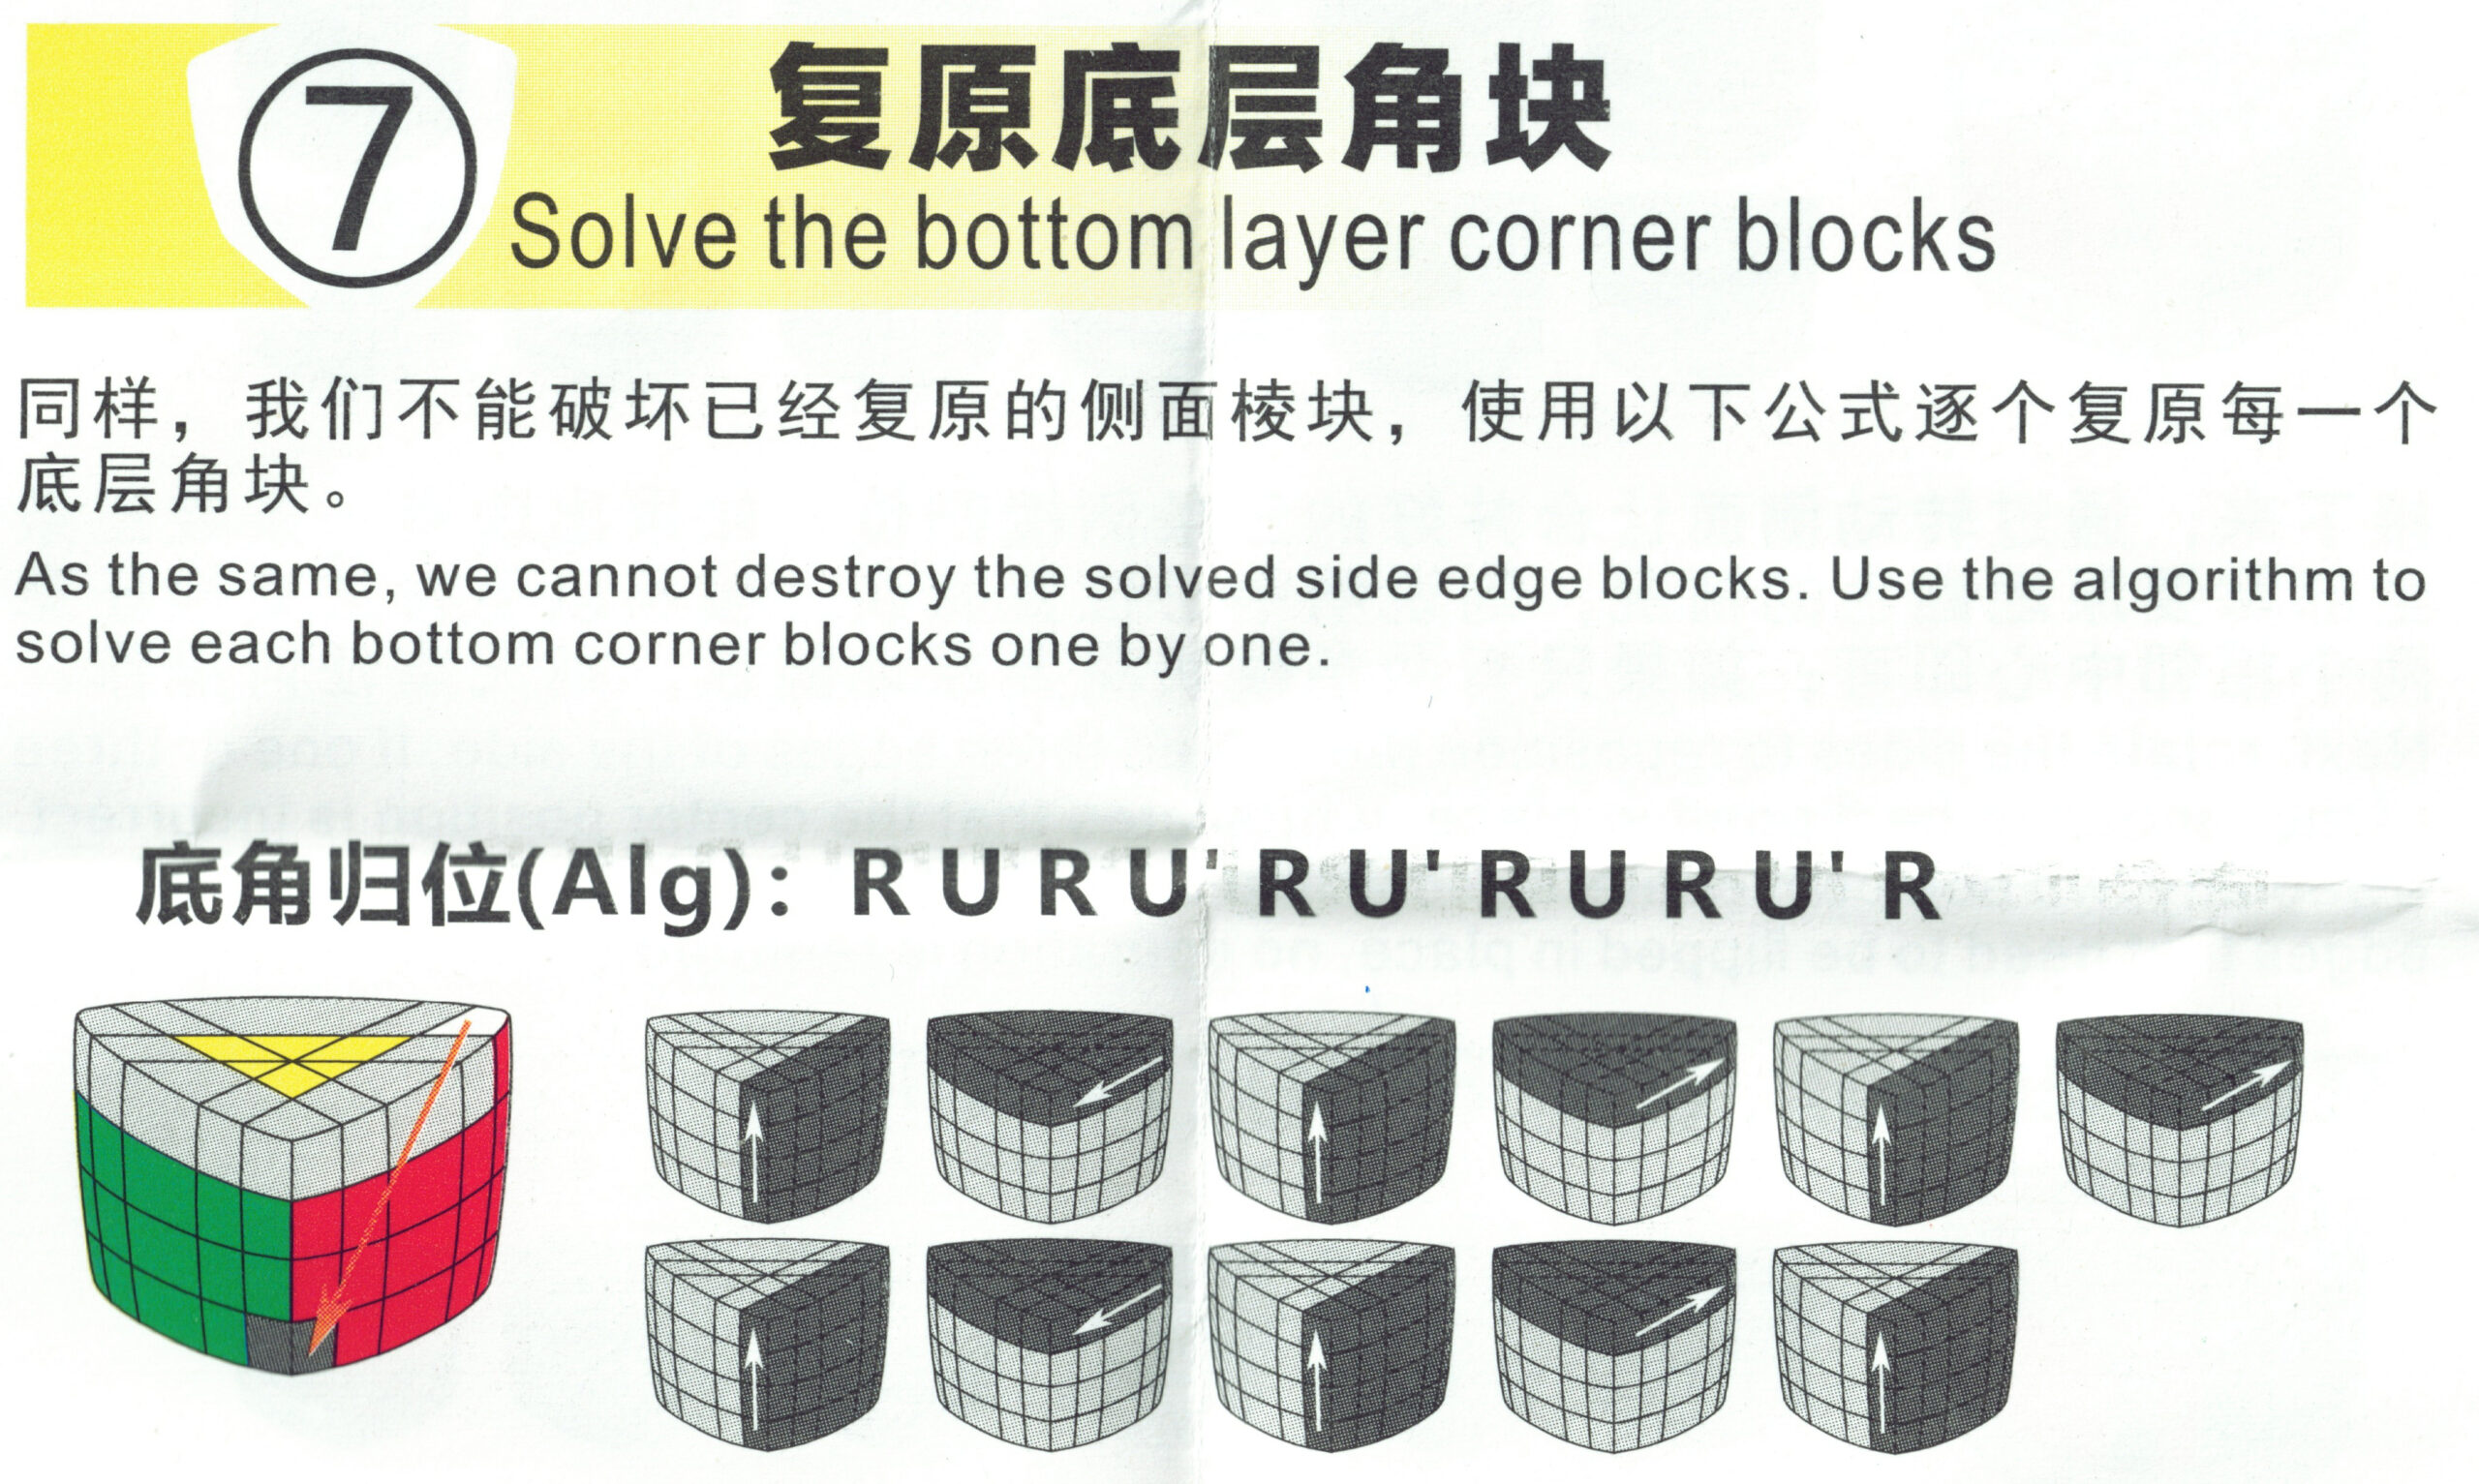
Here, the piece needs to turn clockwise. The algorithm can be reversed, of course if it’s counter clockwise. You’ll turn corners according to how you need to rotate this piece.
R, BR corner, R’, FR corner, R, BR corner, R’, FR corner
Worst case you do it backwards and have to do the algorithm twice. Easy!
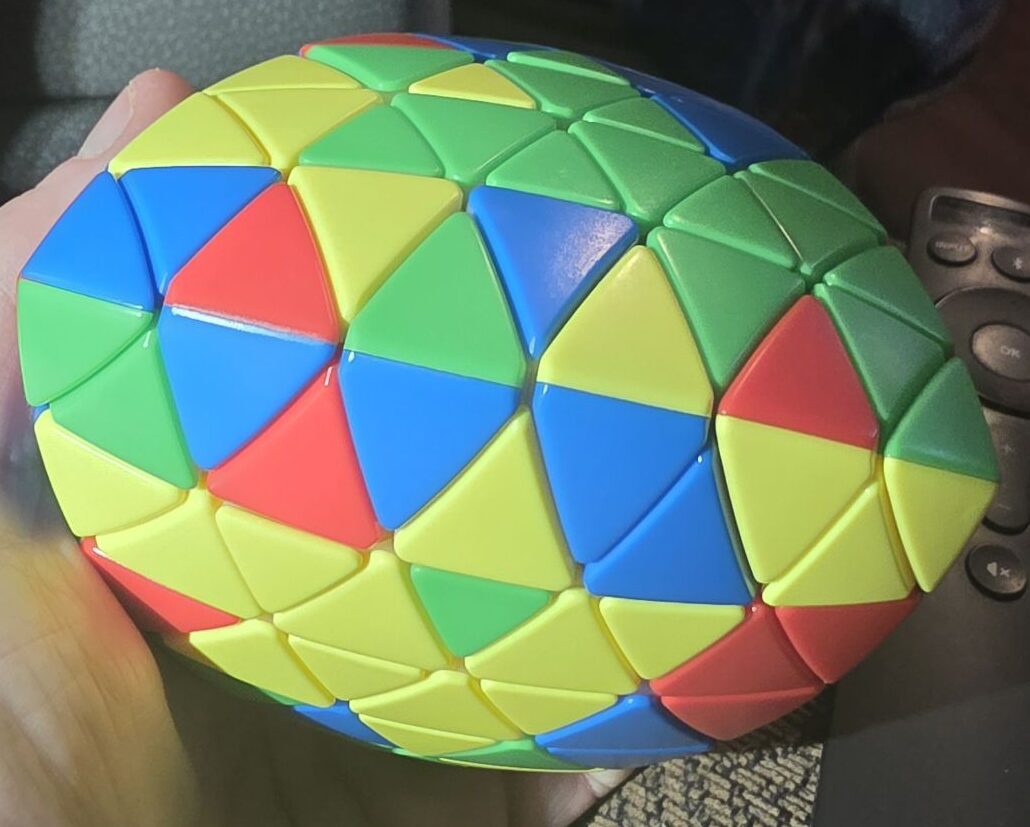
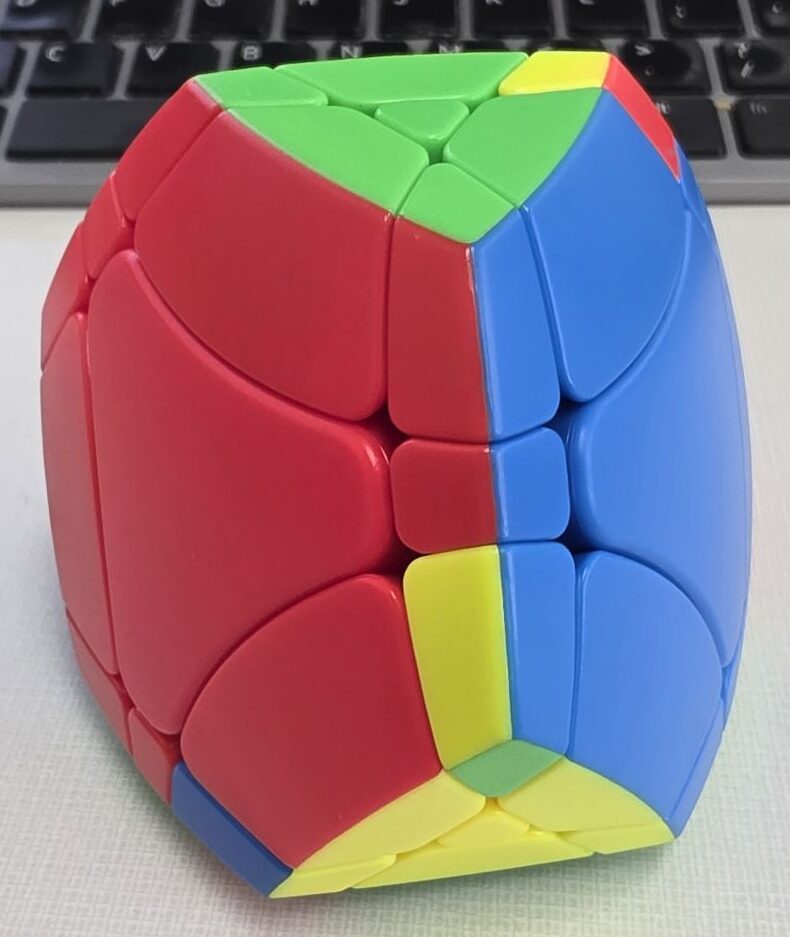
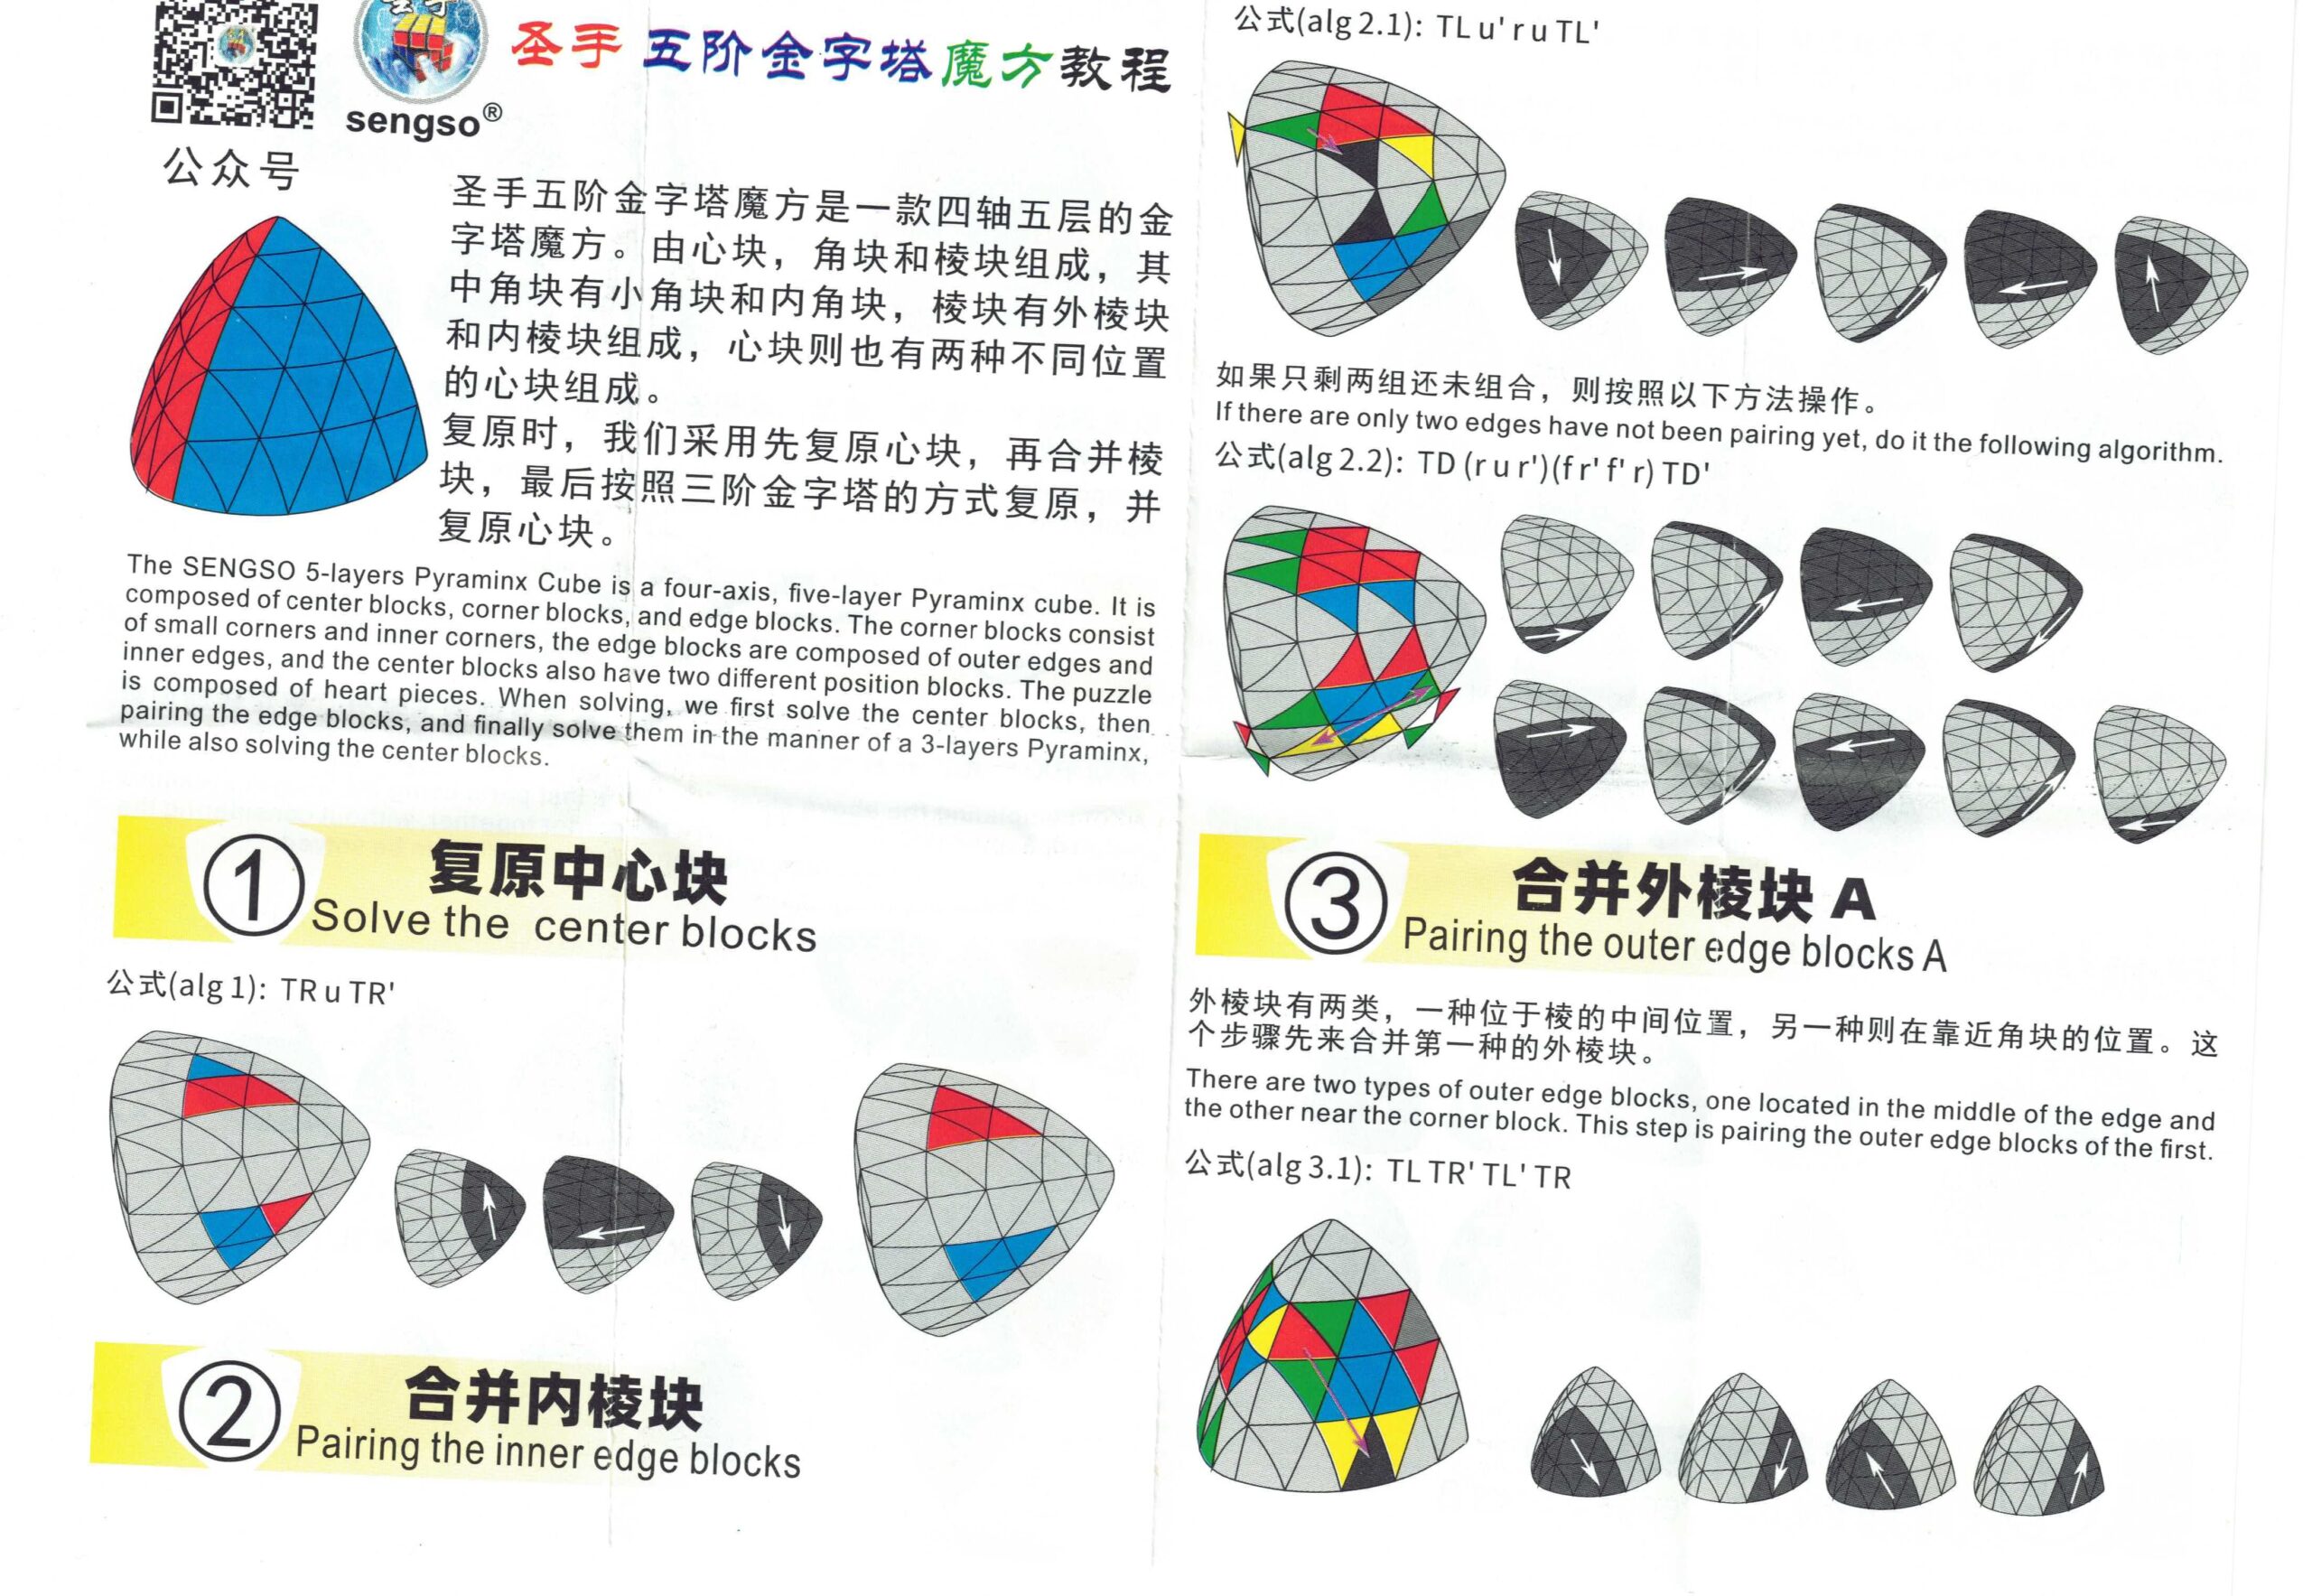
I quite enjoyed the 5×5 Pyraminx so I thought the 6×6 might be fun. I wasn’t prepared for it to be such a different, unique solve. I’m going to try to break down how I did it, having bastardized some other suggestions. Images to come.
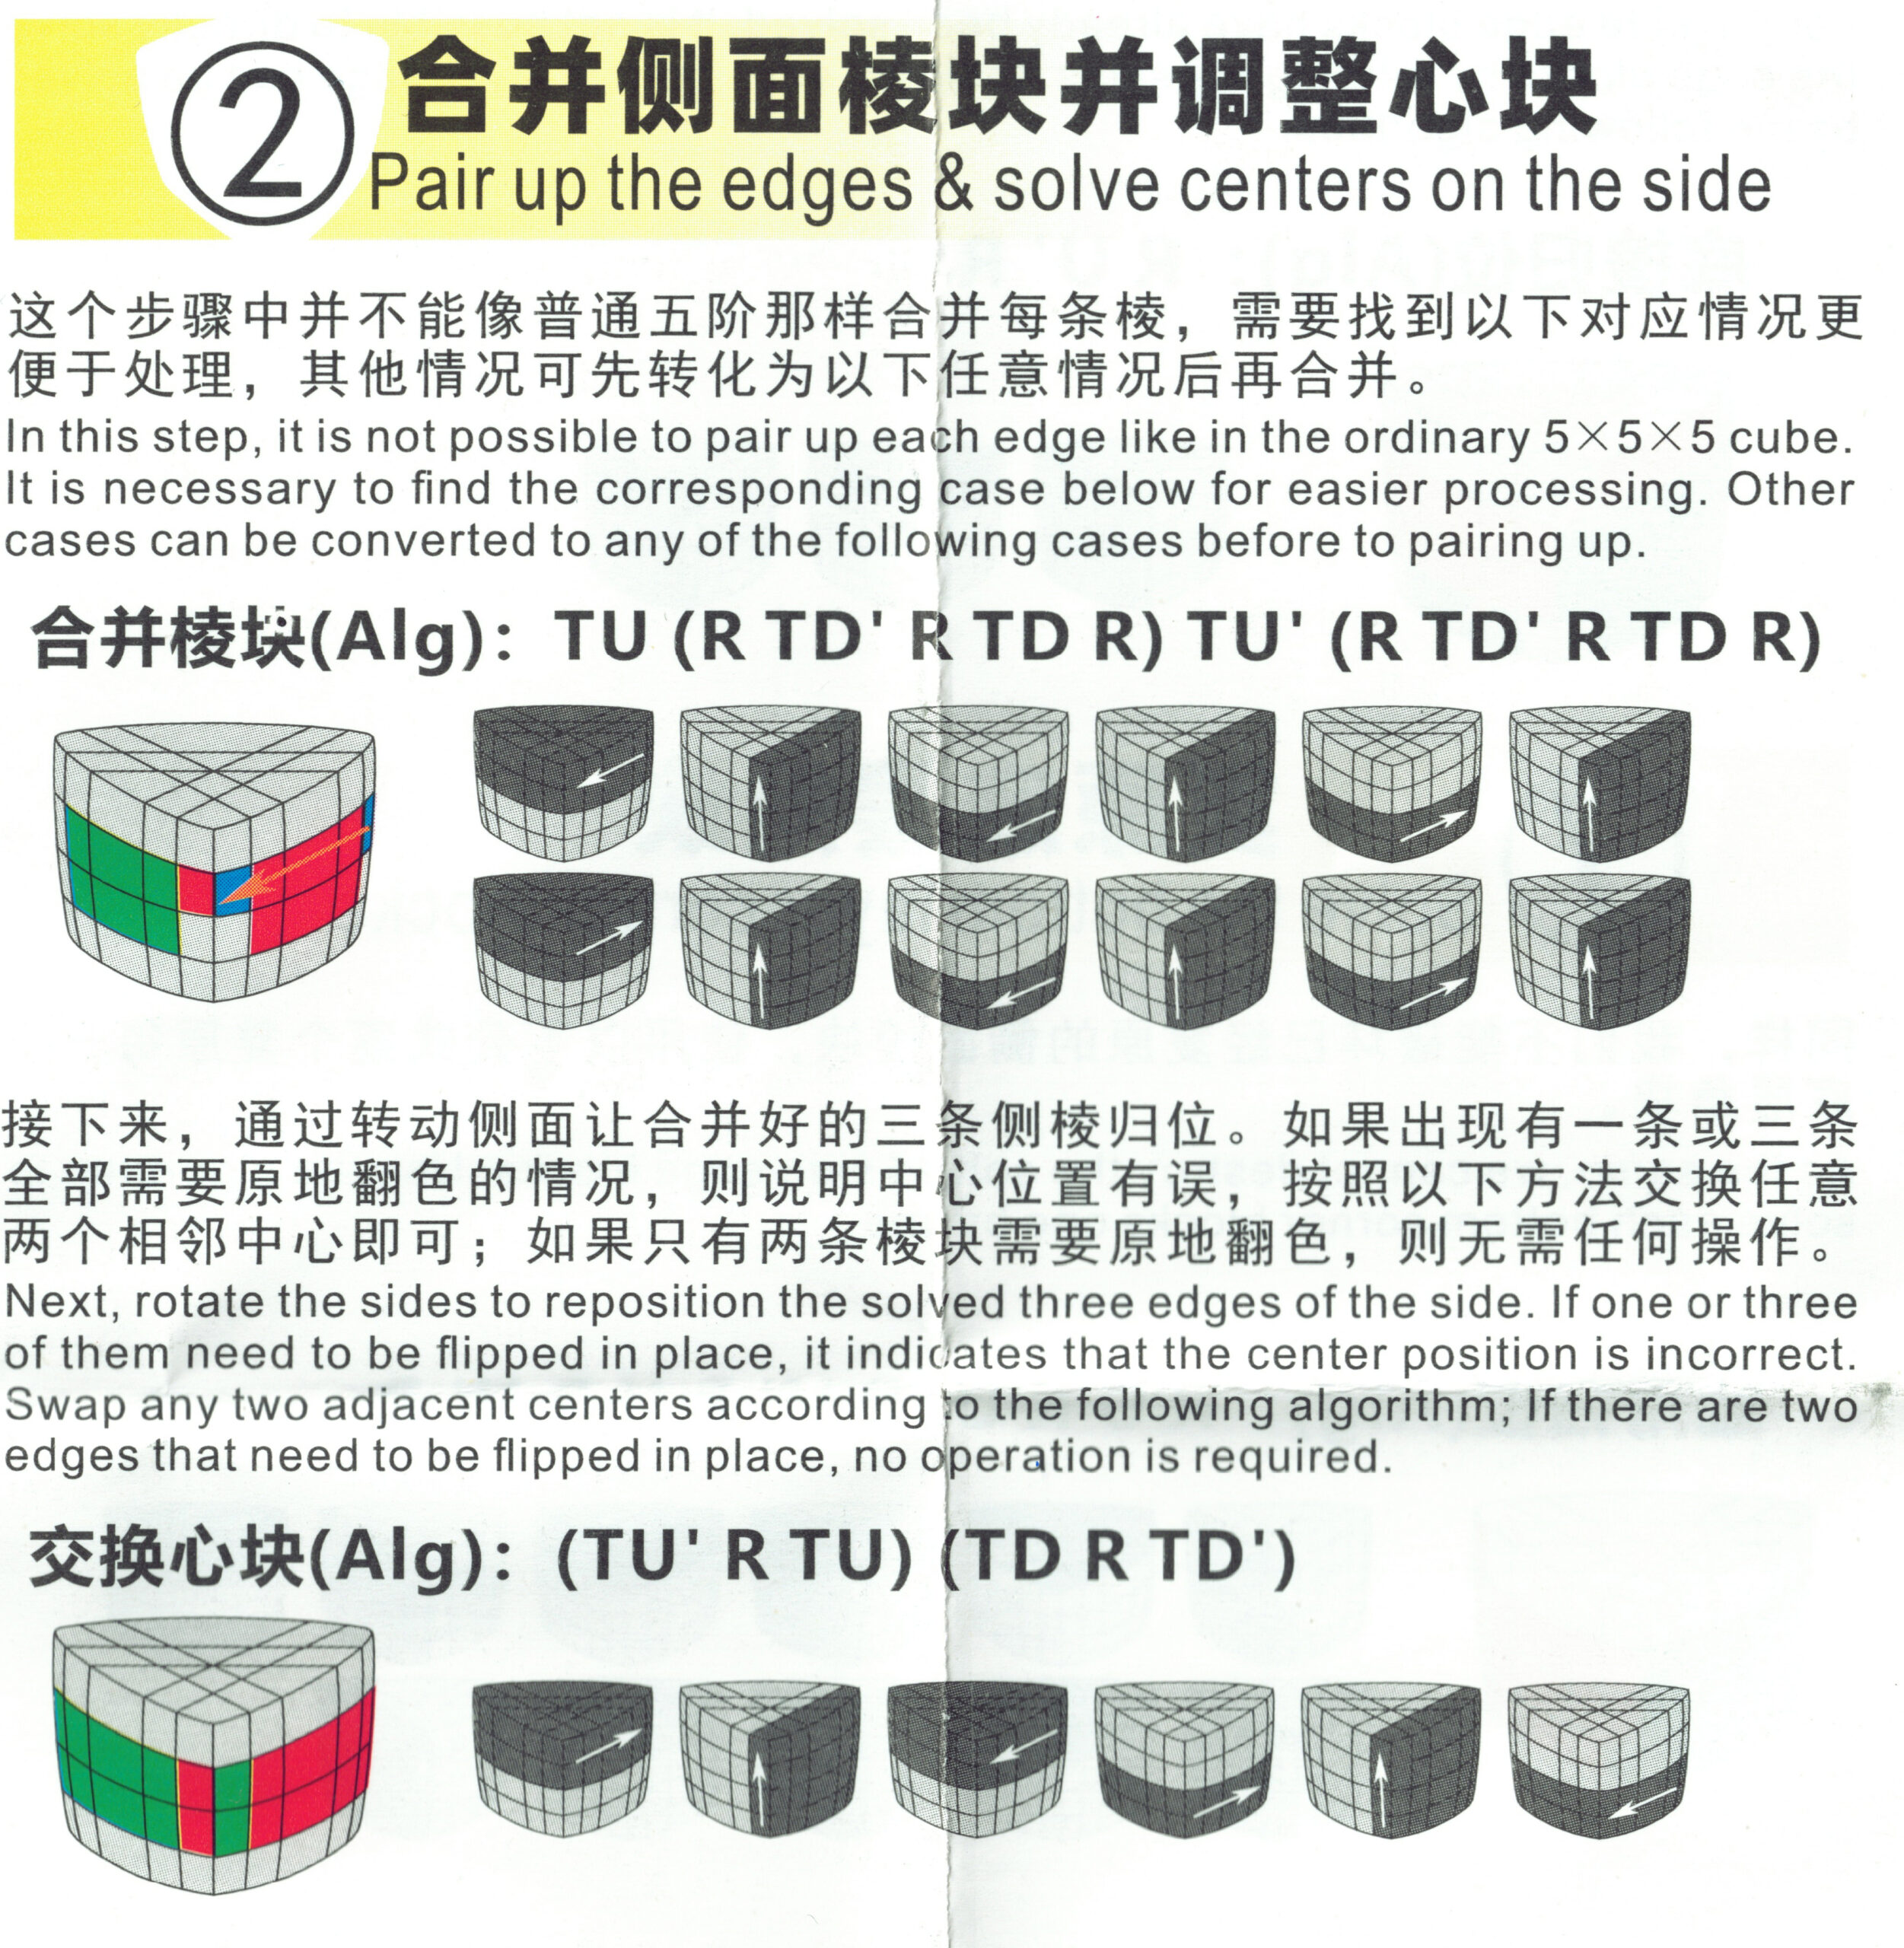
Step One: Solve Centers
Start here by getting the two biohazard centers. For this, we can ignore the inner tips. Those are easy to fix later. Most importantly, ensure centers match the outer tips: Red/Yellow/Blue in clockwise fashion. When you need to swap centers – and you can do this for any centers – keep reading.
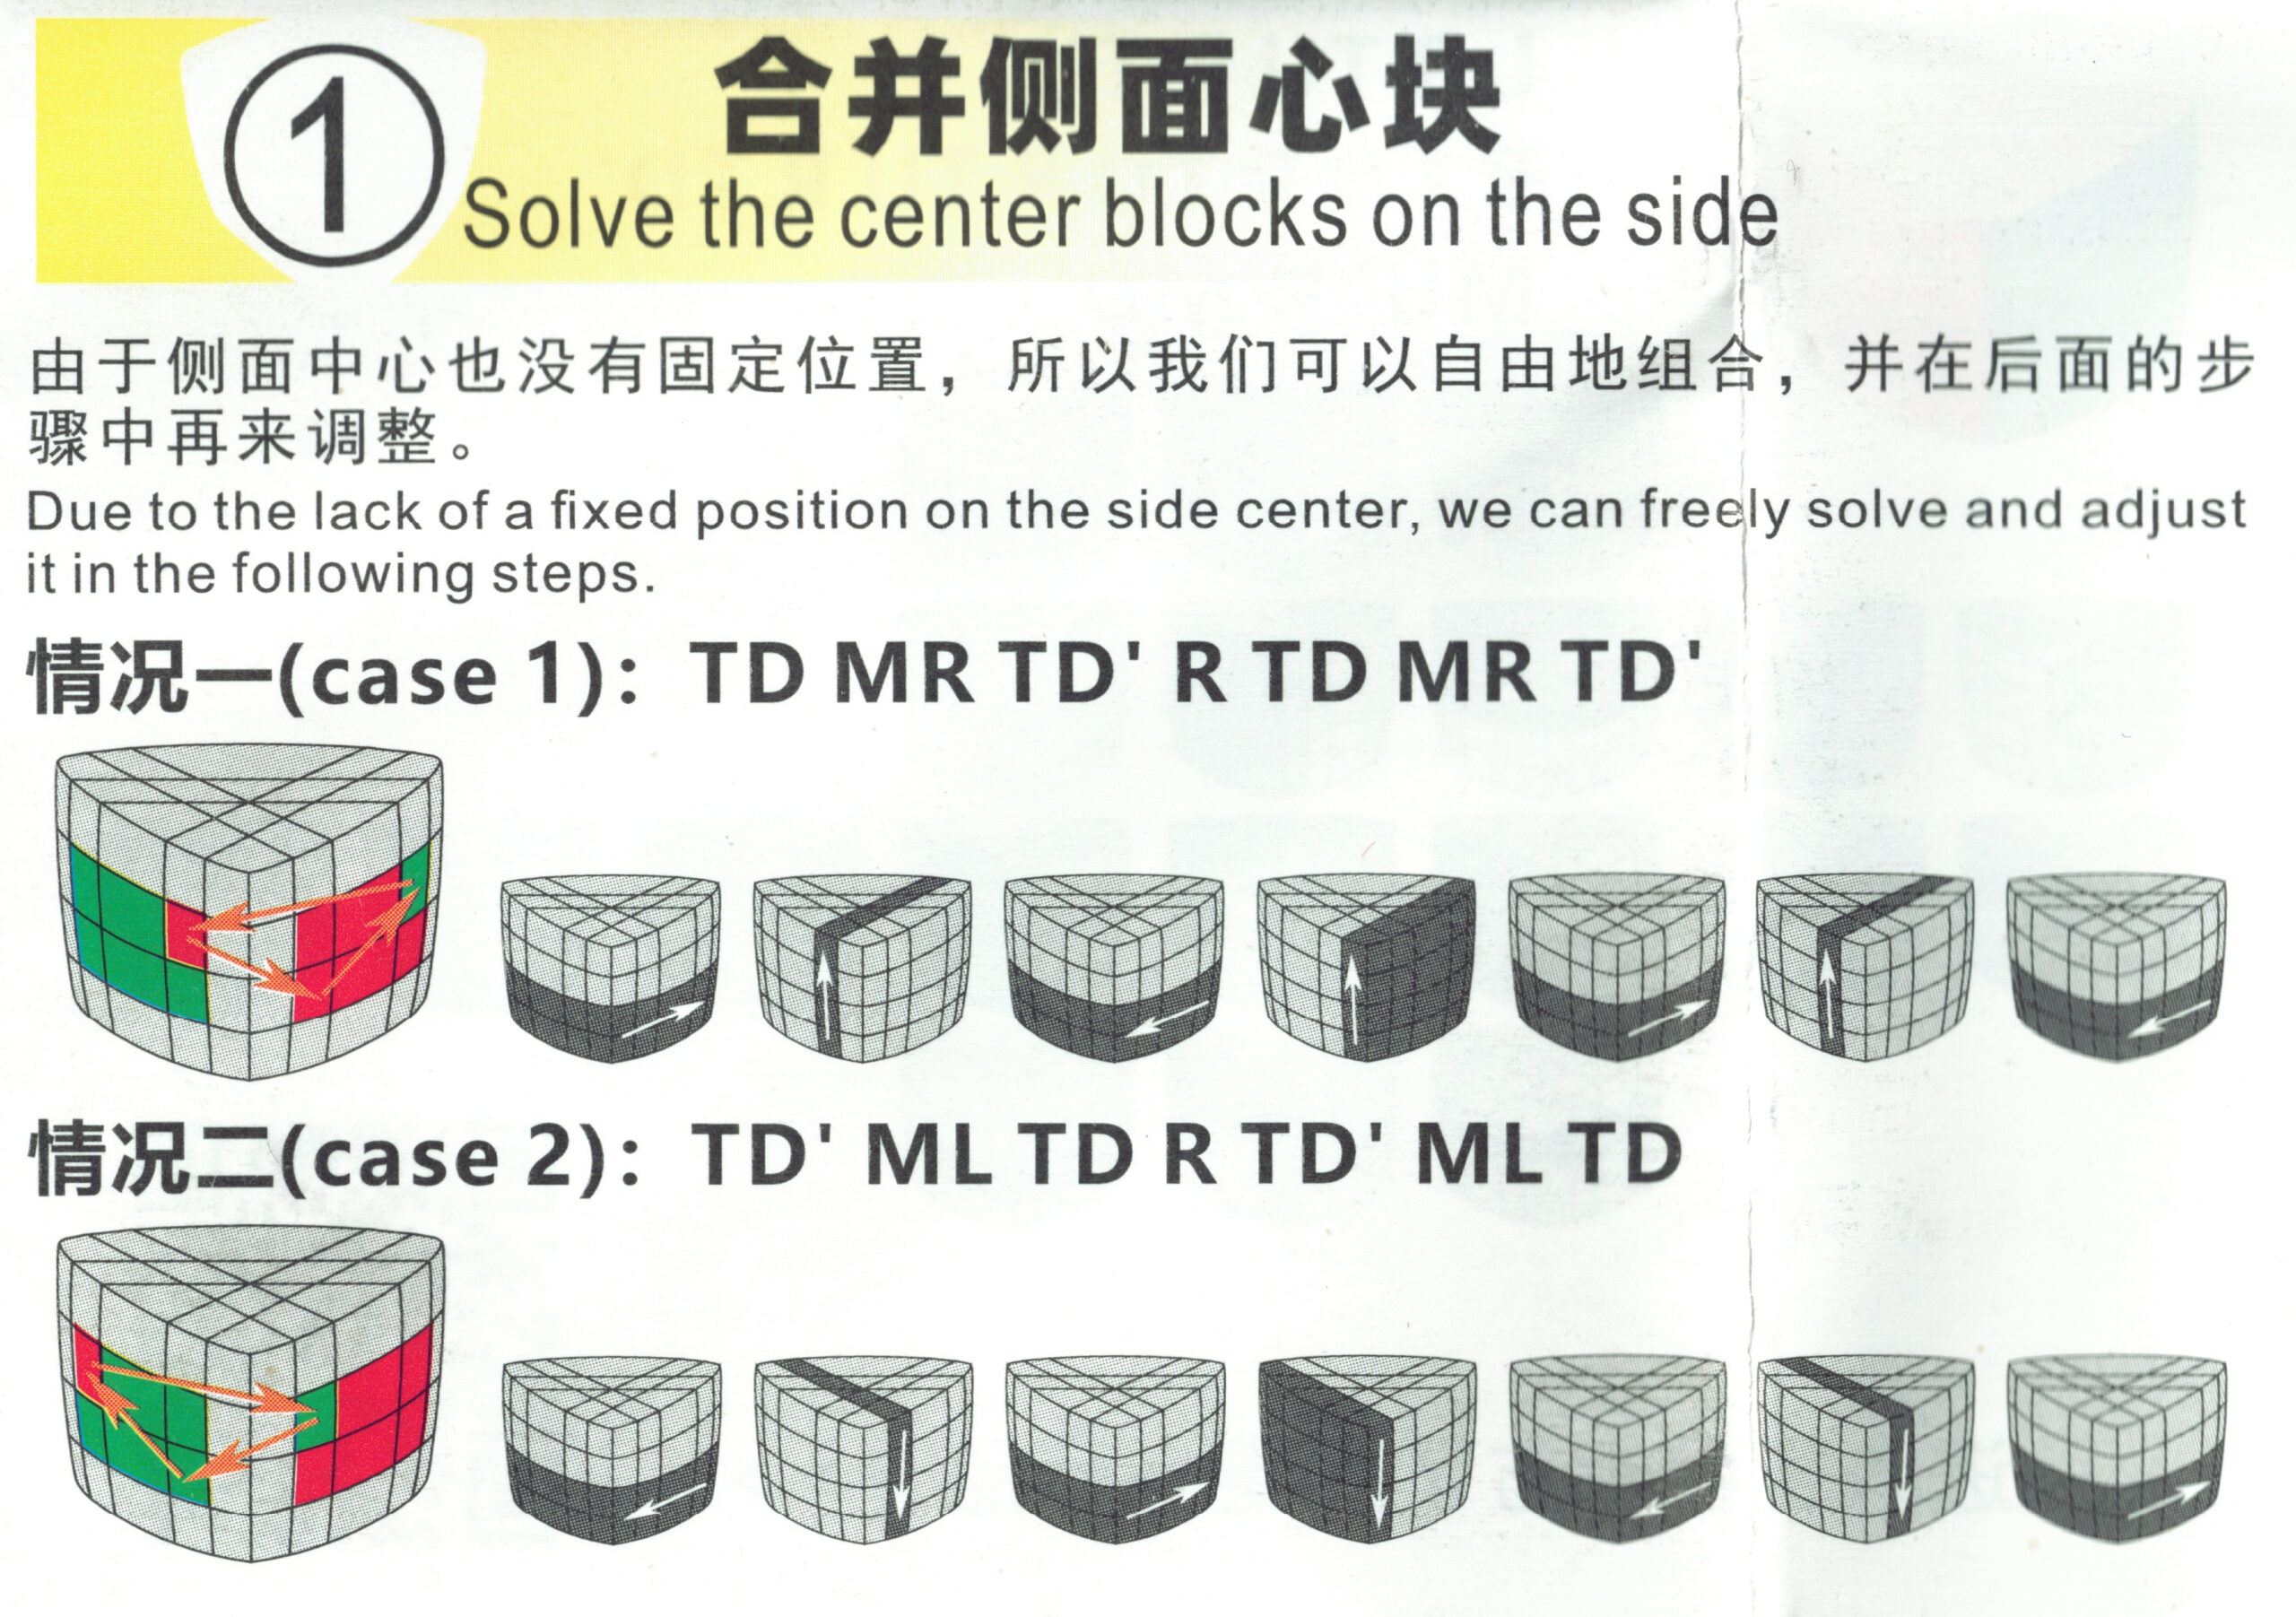
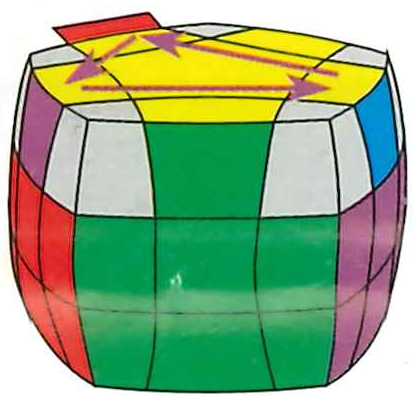
 If you get one center edge swapped, here’s what you do. In this image it’s yellow and green. In this position, you could just bring the top yellow down to the green, but you don’t want to do that just yet. Move the front face with the yellow center clockwise or ccw so the wayward green piece is out of the way. We’re going to do a pair of D/D/U/U algs. In this pic, the yellow on the top face is on the left side, you’ll start on the left. Do a D/D/U/U moving the yellow down to a dummy/properly-placed front-faced yellow piece. Then move the front face back so the incorrect green piece is on the top (where it’s shown in the pic). Do the D/D/U/U again, but now start on the right. This will reverse the swap and you’re golden!
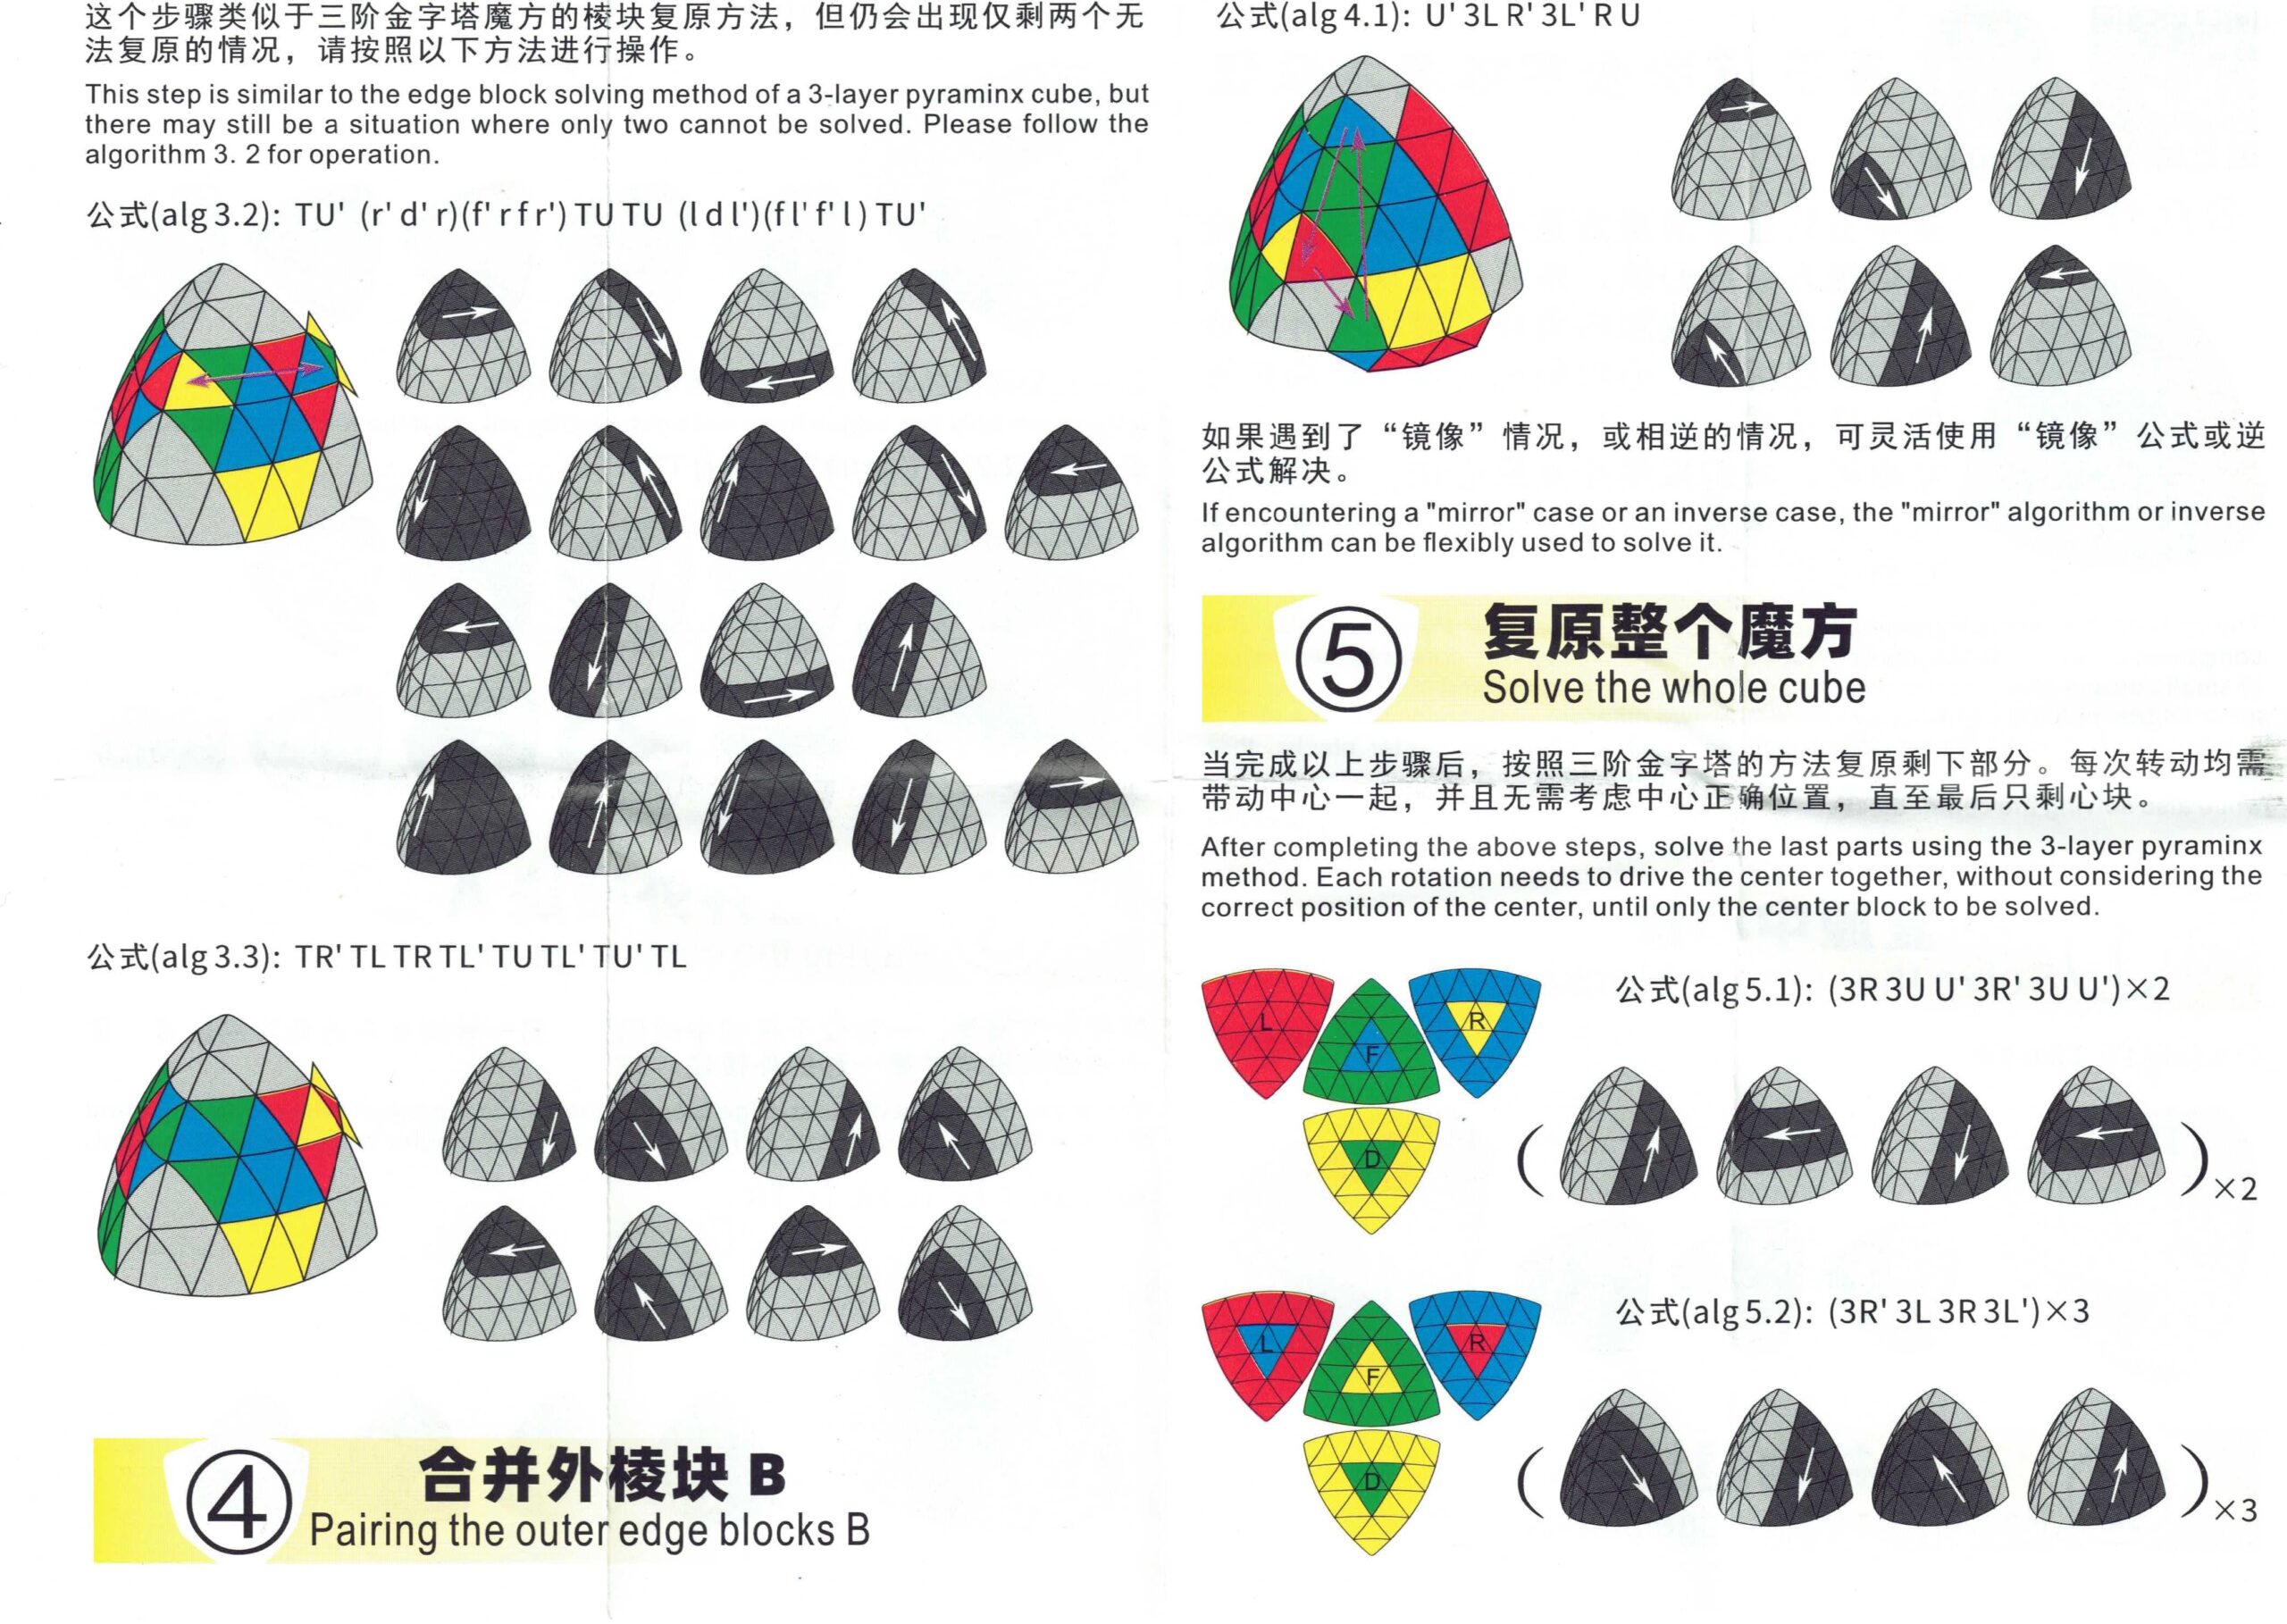
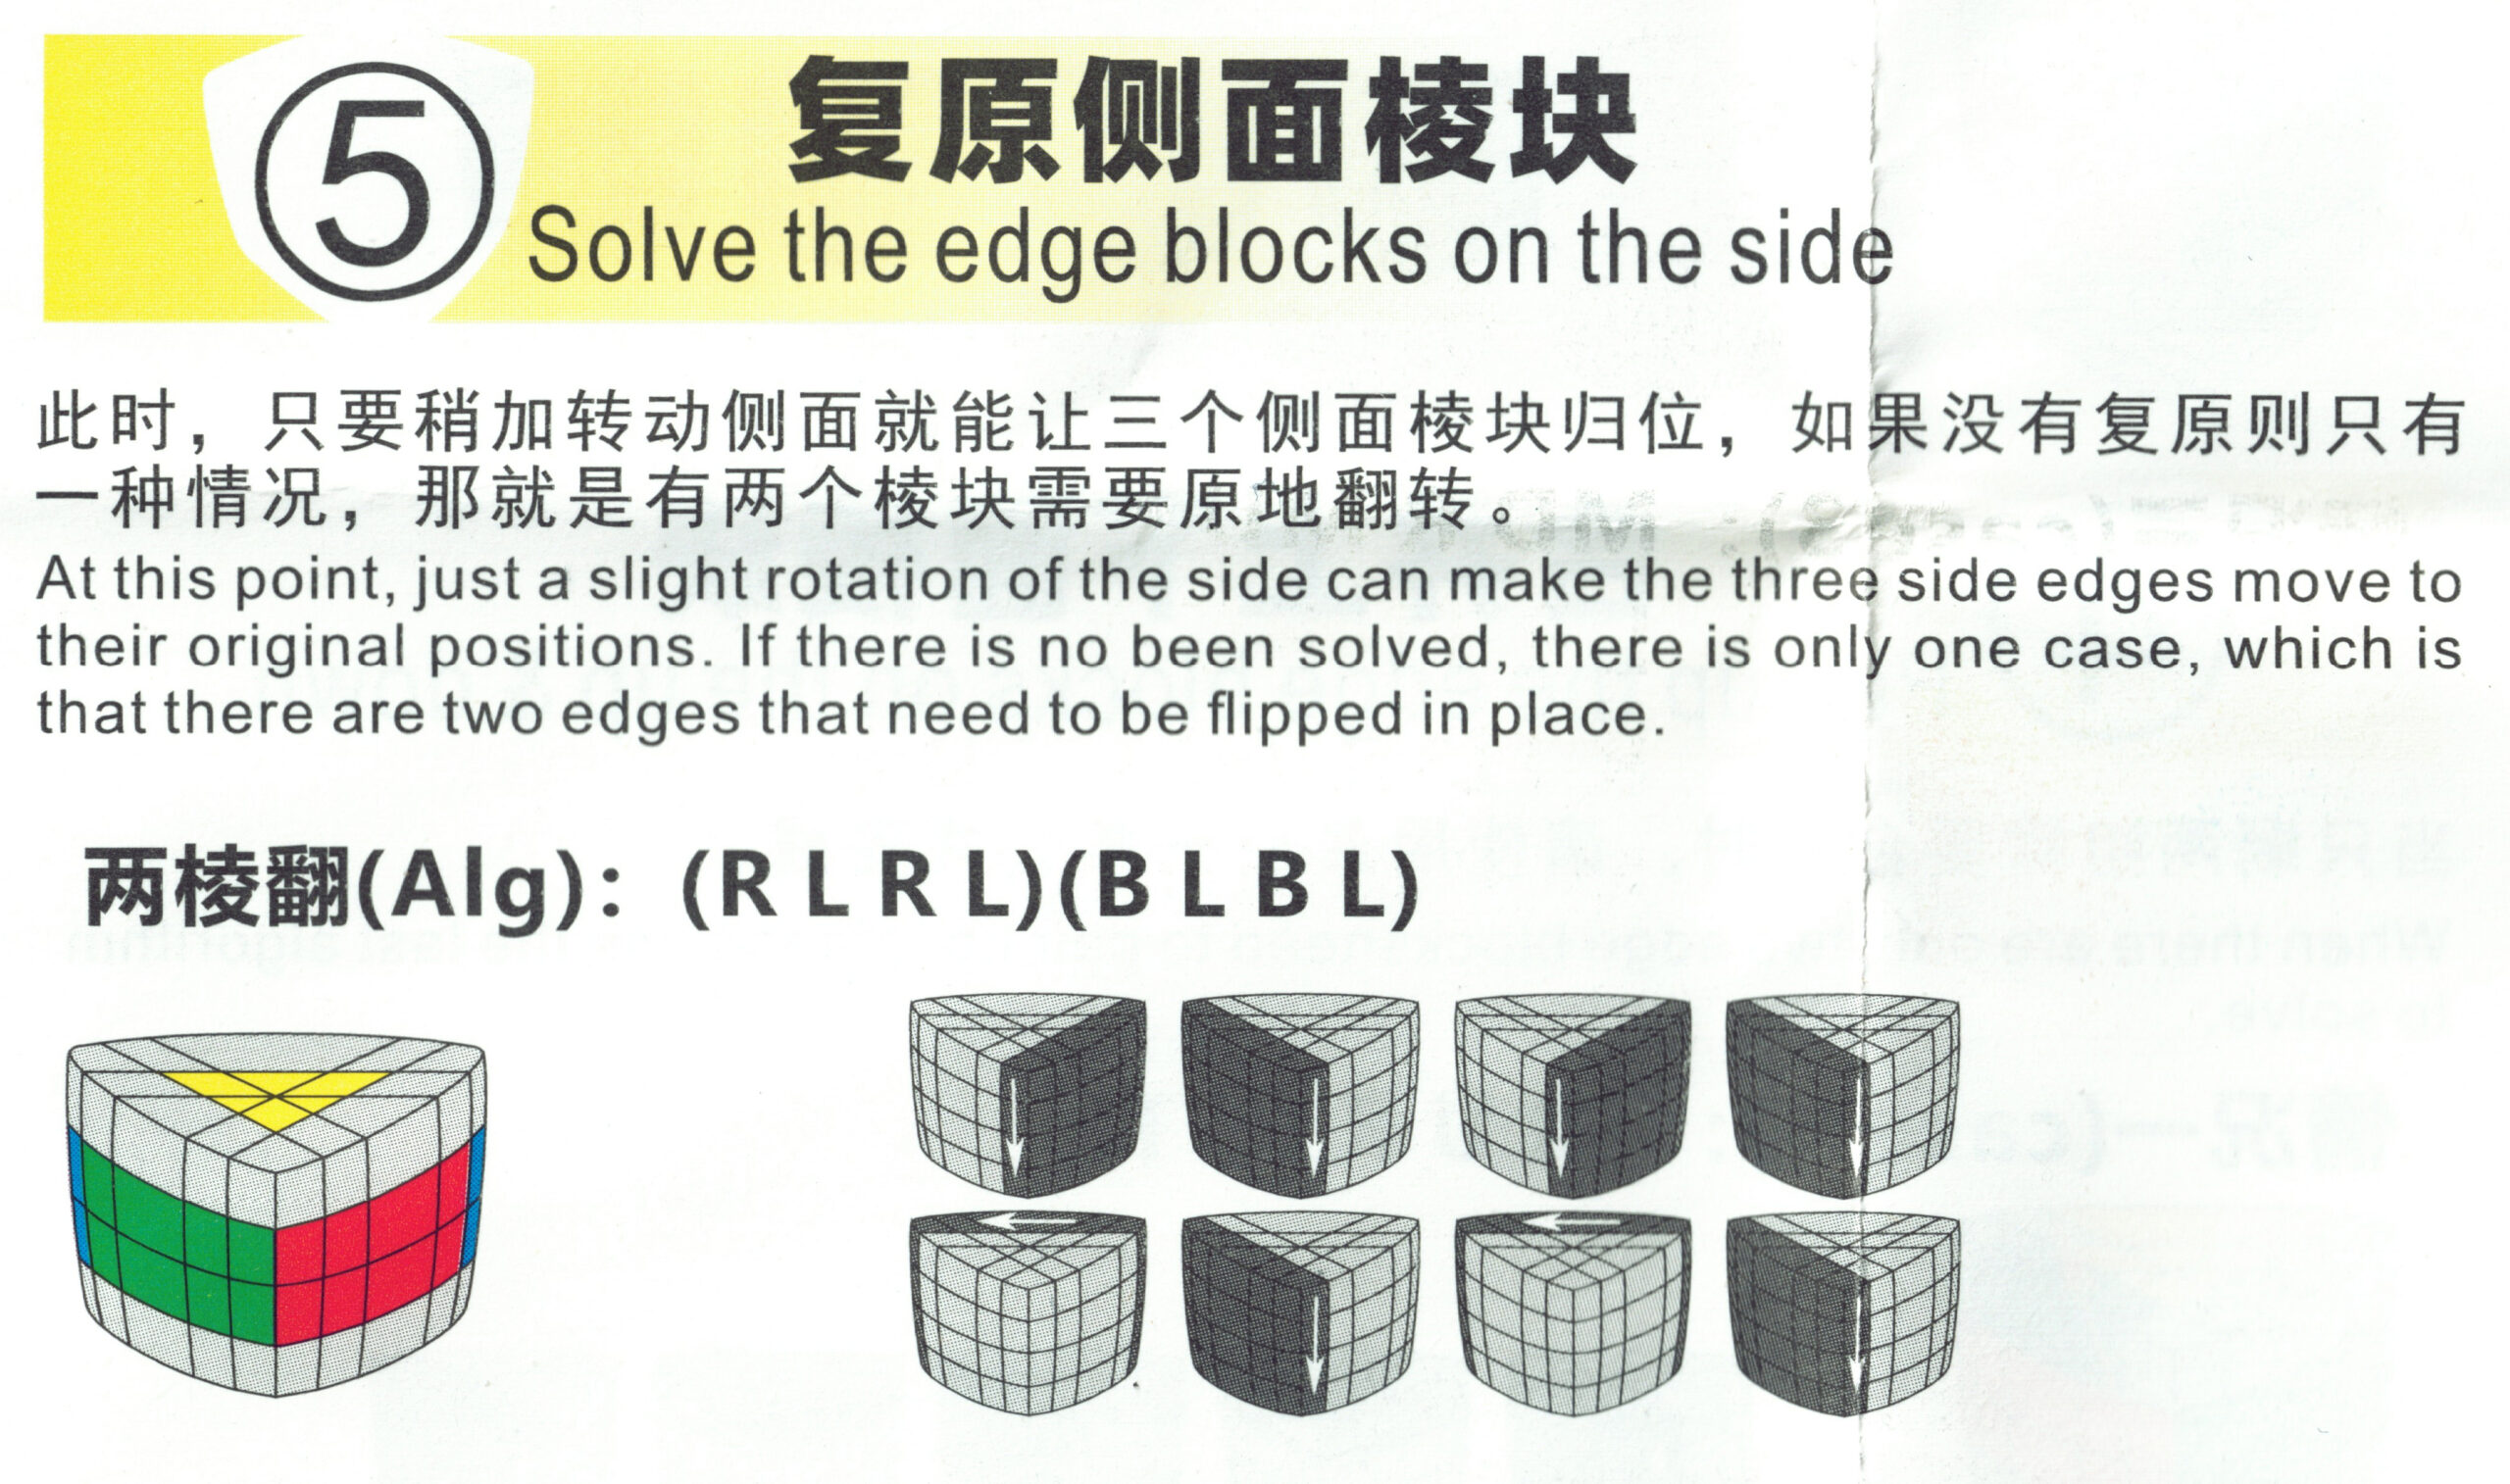
Step Two: Get Three Edges
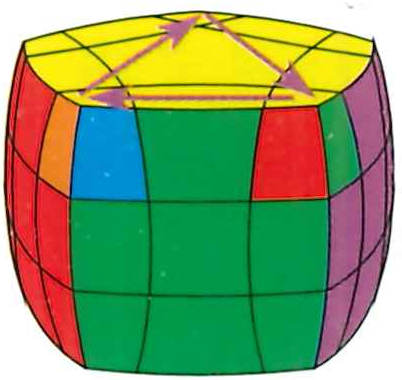
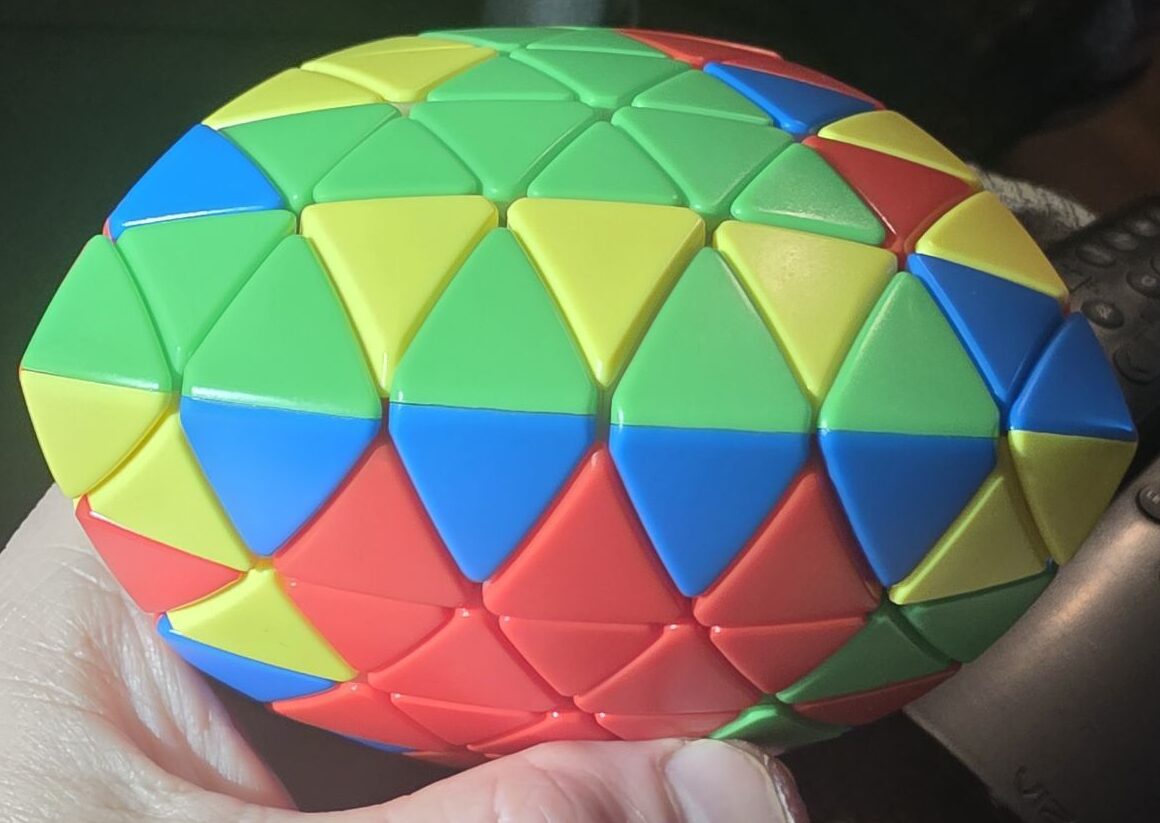 For this, you’ll be matching these three red/yellow edges here.
Find your piece, position it on the right or left and bring three layers down to put it adjacent to the center edge. Next, move your entire top layer away from the tip you just turned. If you’re matching on the right, then move top layer left and out of the way (and vice versa). This is like a 4×4 edge-match, where you’ll replace it with another mismatched edge. You’ll eventually have to figure out what to do if you have only two edges left, but that’s for a different day. Keep matching these until you get them all sorted out. You could always do two at once, if you’re smart. 2025 me? Not so great.
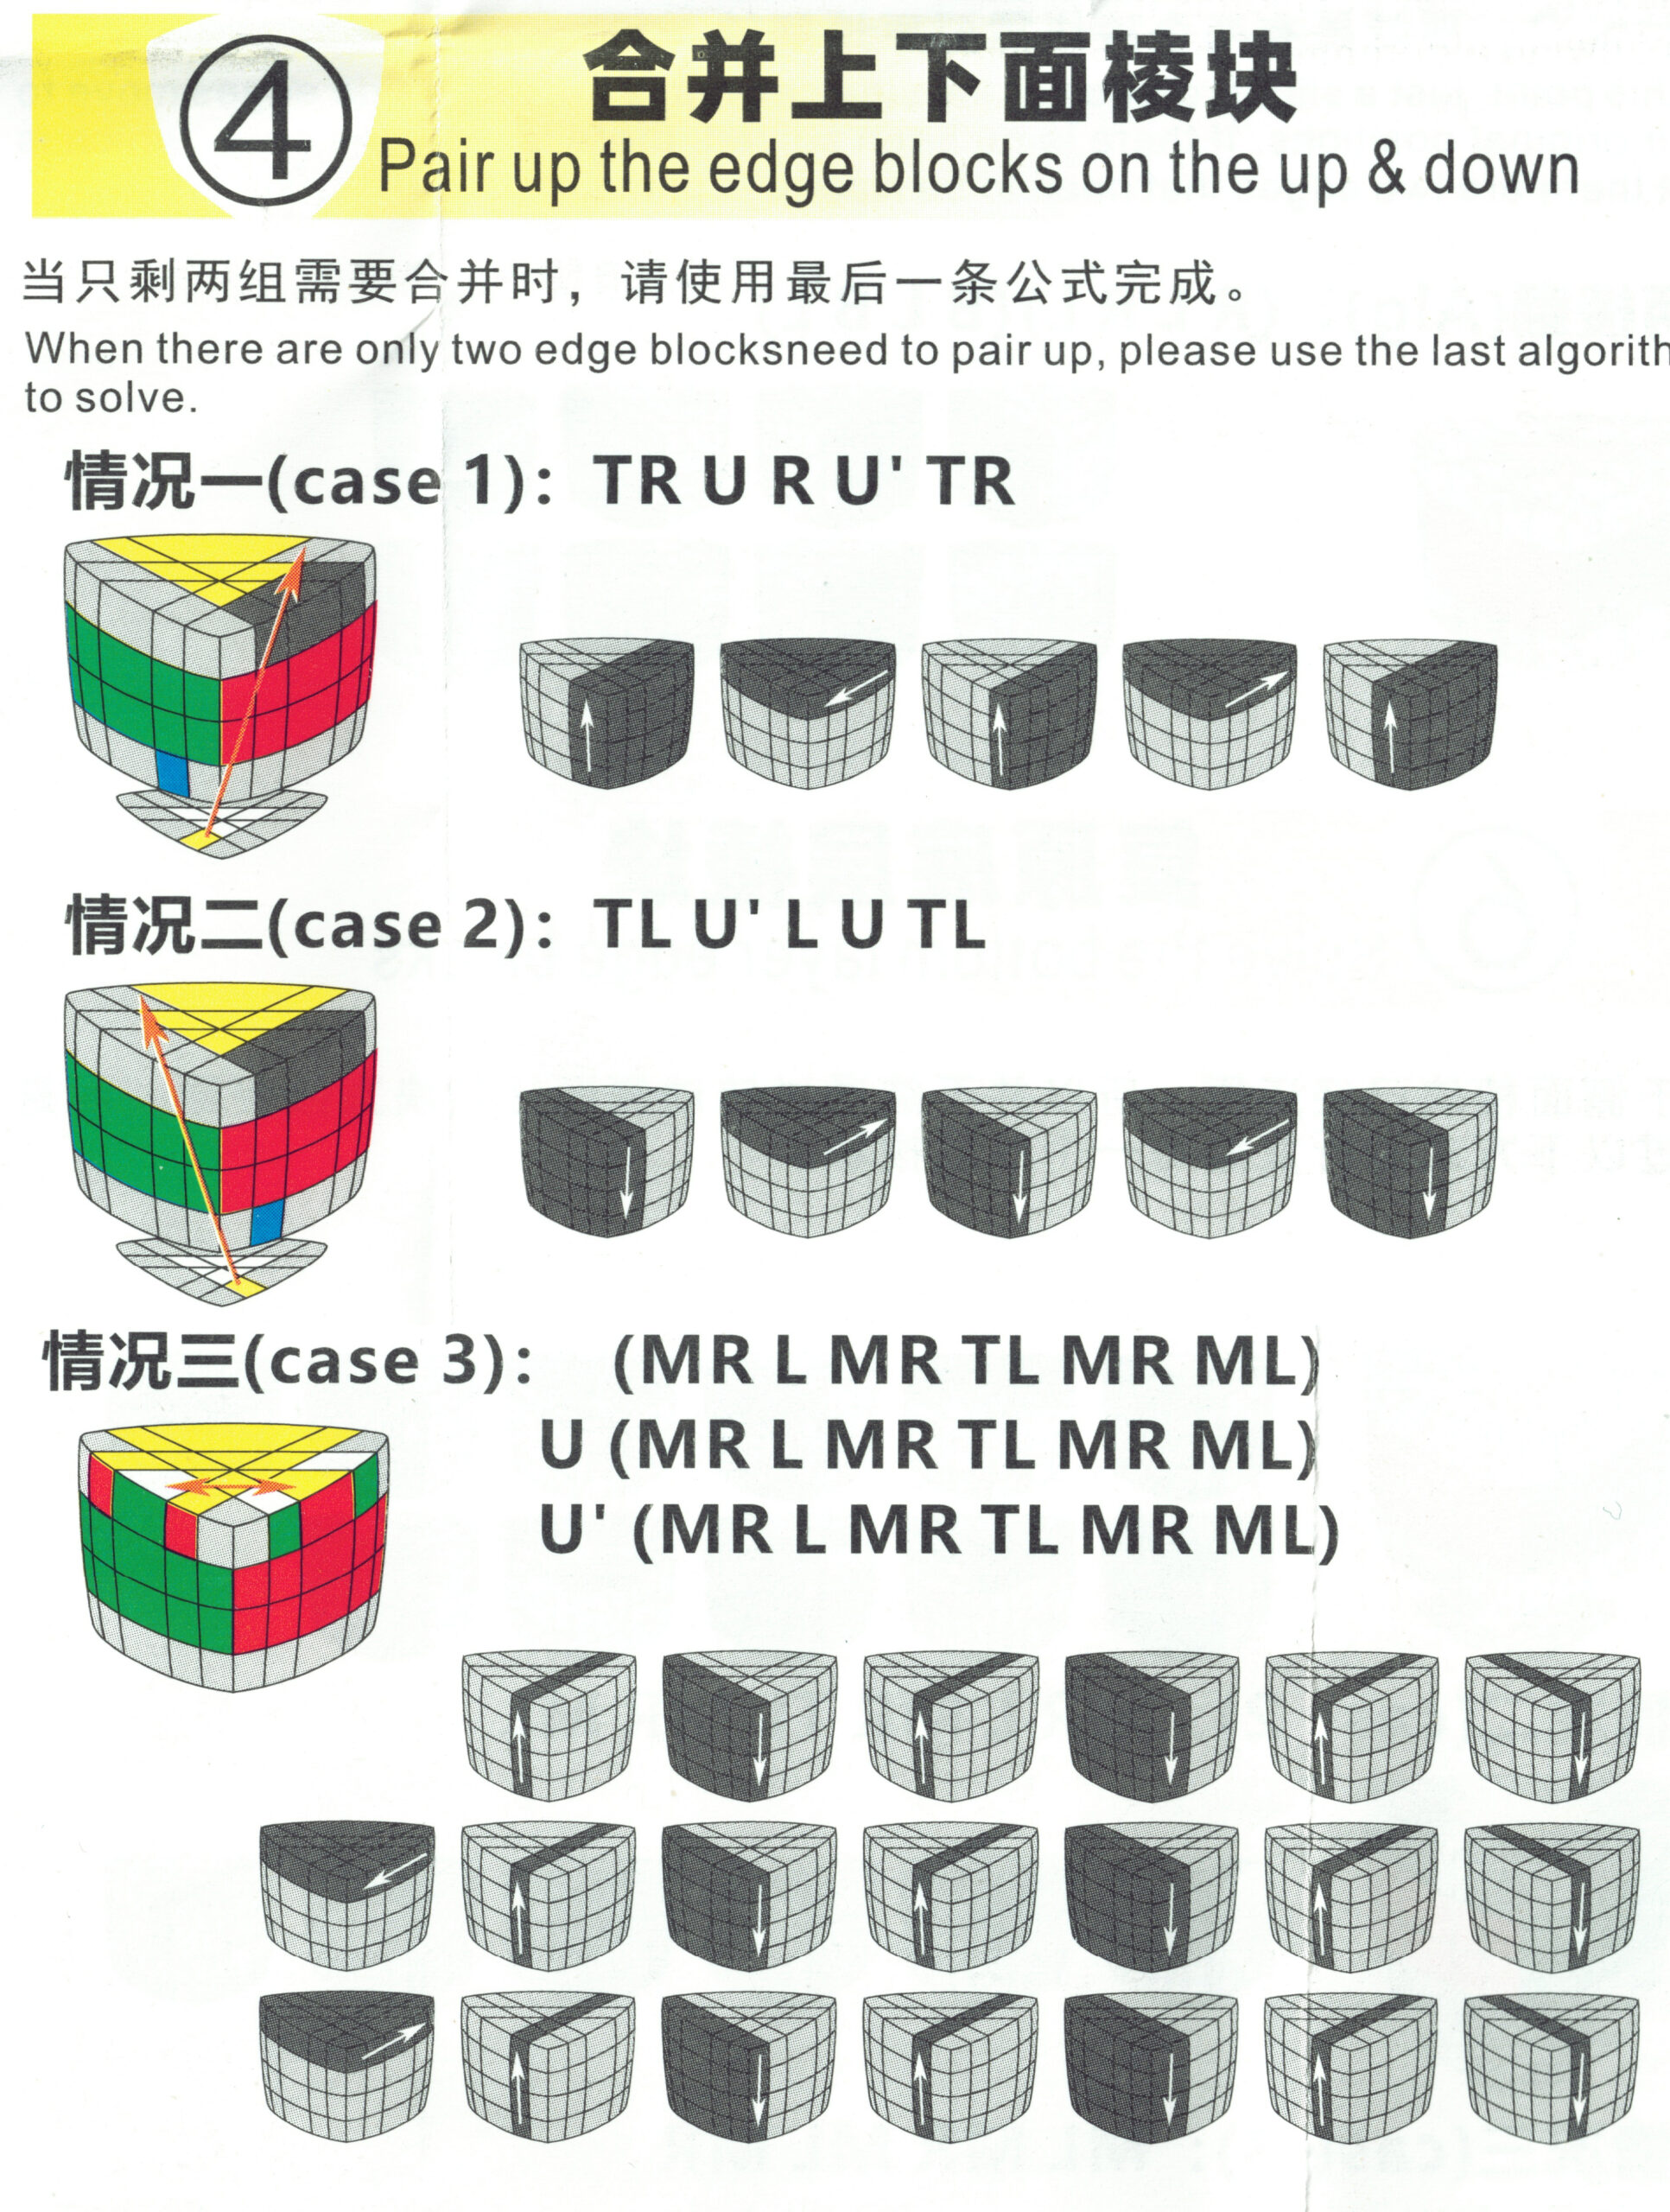
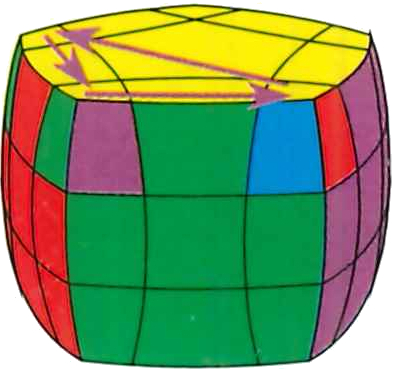
Step Three: Get Inner Edges
There are four green/blue pieces shown in the pic above, but we’re talking about the inner pair. The outer pair can be matched by turning the tips after this step. Easy.
For the inner pair, this is a simple D/D/U/U algorithm, as these are not deeper cuts. Just do it properly to retain the center tips. It’s pretty simple.
Step Four: Jing’s Pyraminx
This really just uses Pyraminx algs. If you need to swap four centers, give it a D/D/U/U cycle three times.
 This is a relatively-simple and rather-fun puzzle that really only requires two steps and a little bit of intuition. Let’s look!
Step 1: Solve Small Edges
If two are flipped (correctly placed, but flipped)
Step 2: Solve Triangle Edges
Mostly intuitive
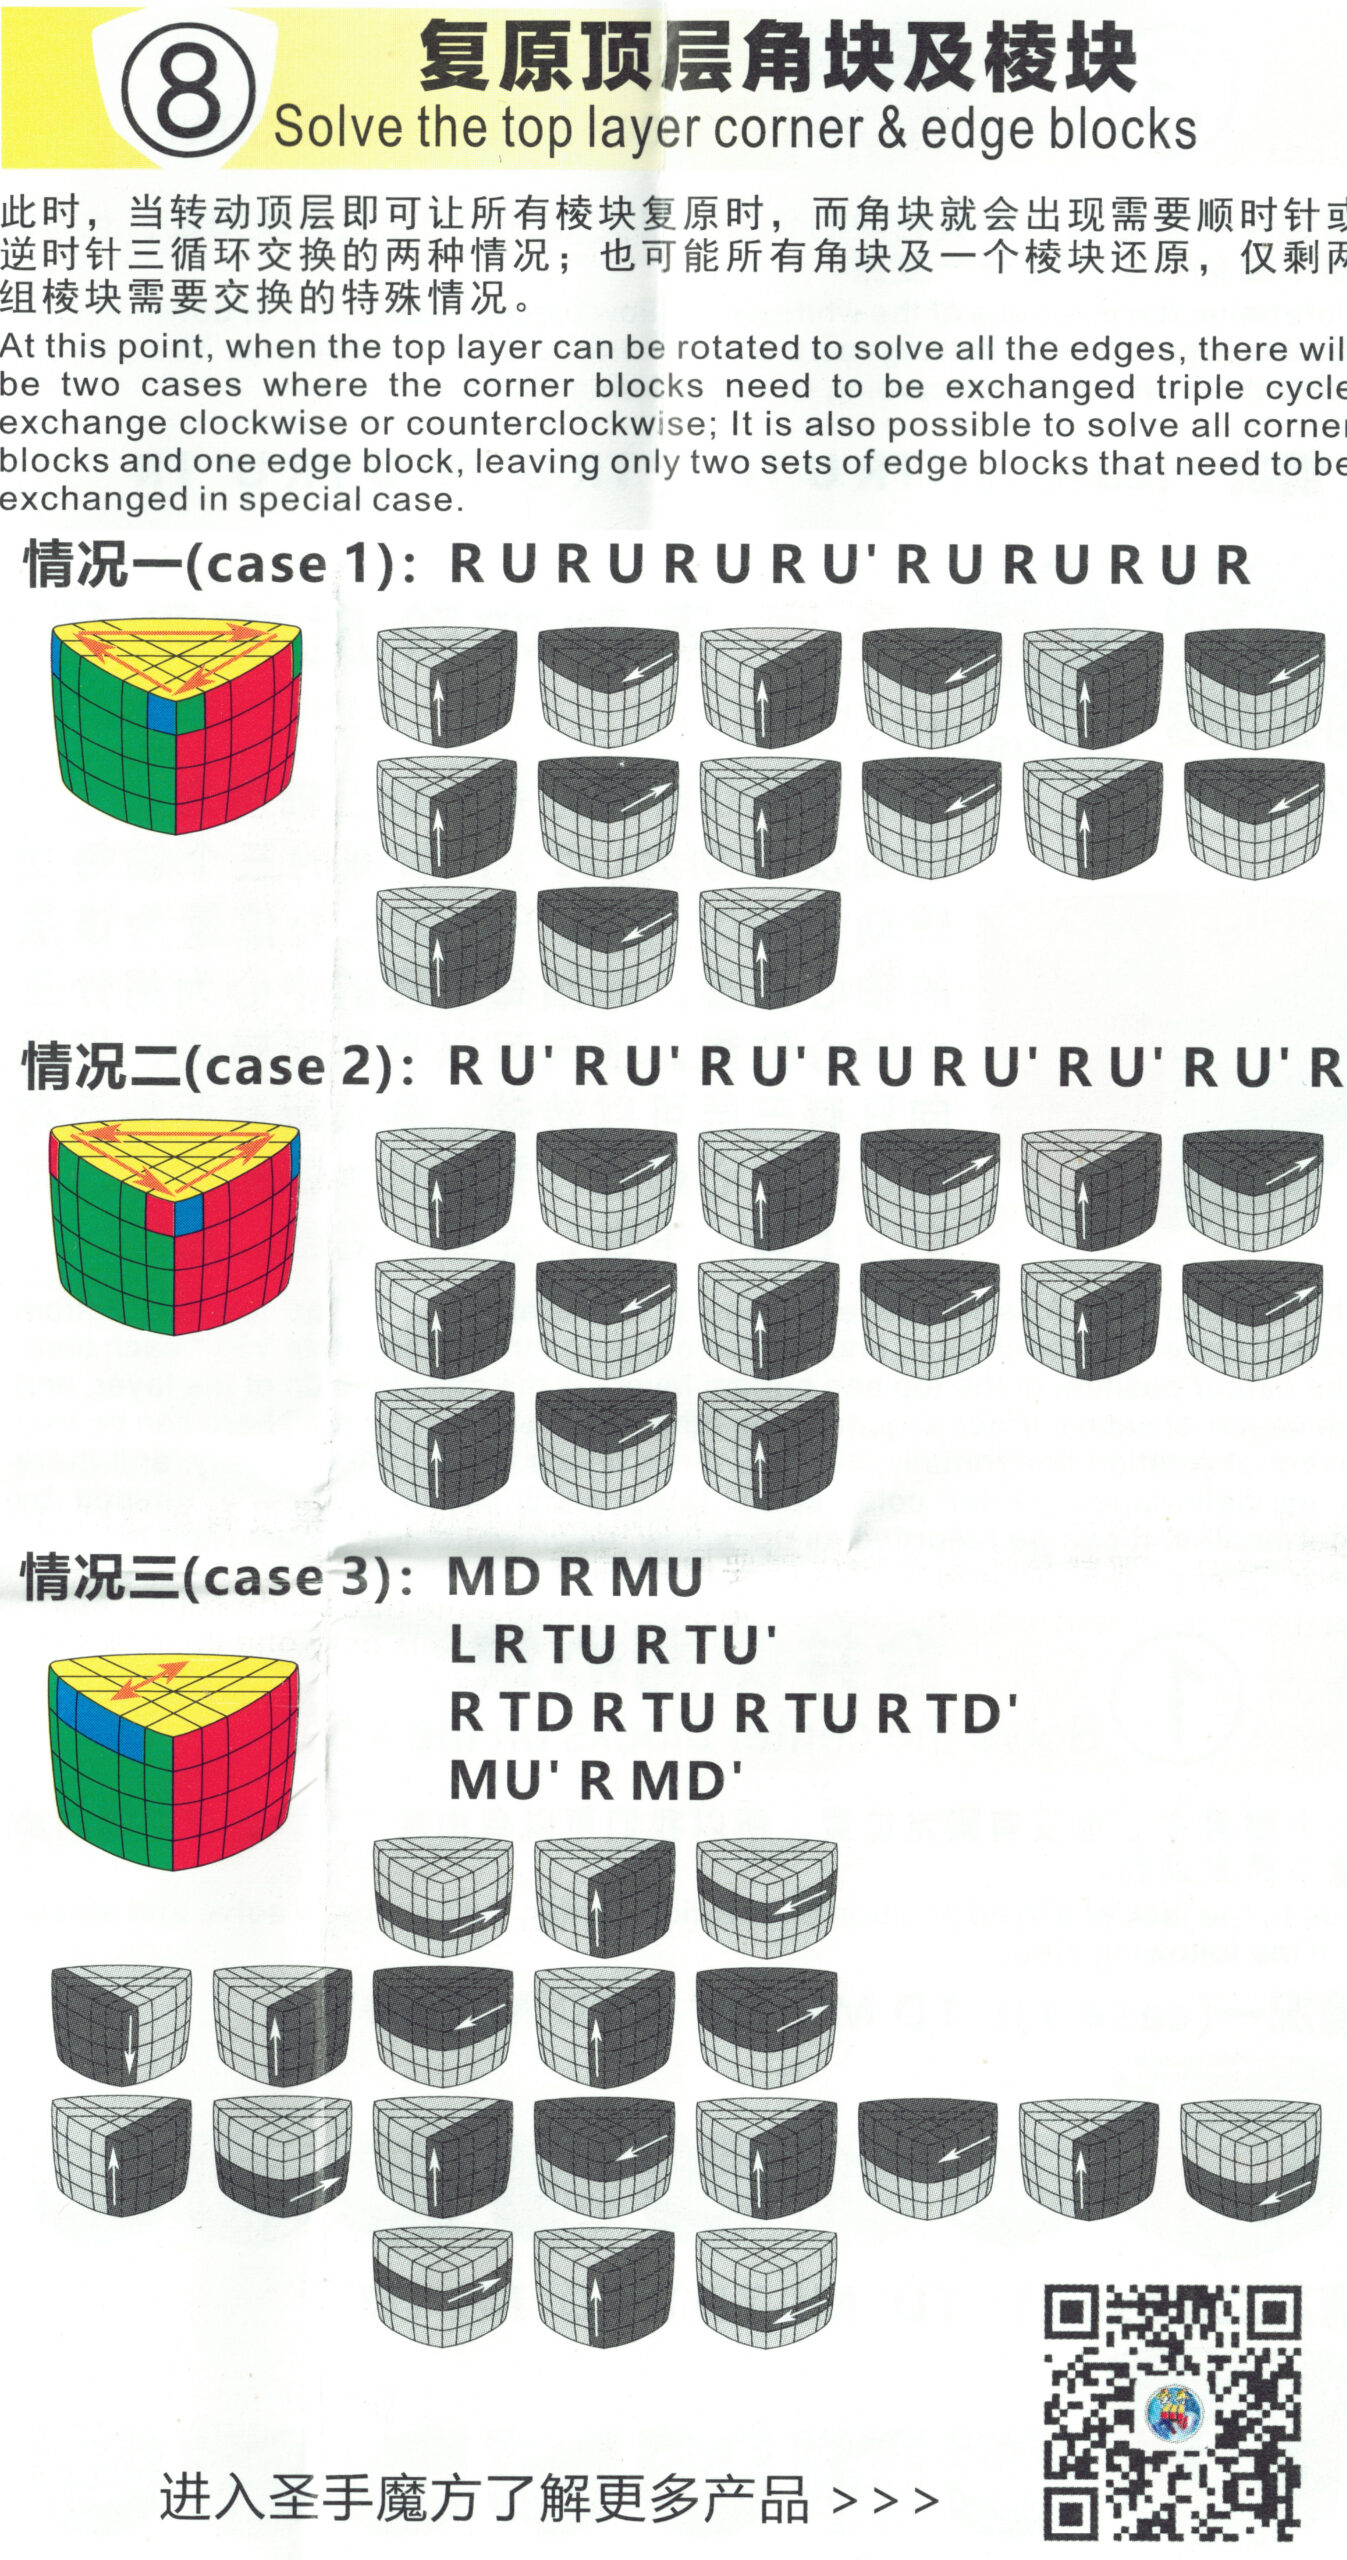
Step 3: Solve corners
Three-cycle
You can do this starting on the right like this photo or on the left. Just a mirror algorithm. For this one:
This guide is for the 4-Layer Pentahedron, but it works for the 5-layer version as well.
Some of these instructions are wrong or incomplete.
Step 2: This is a three cycle, not a swap as shown below.
Step 4: The same, this is a three cycle. I was stuck here as I had clockwise/ccw backwards.

Just images for now until I can figure it all out. This puzzle has perplexed me!
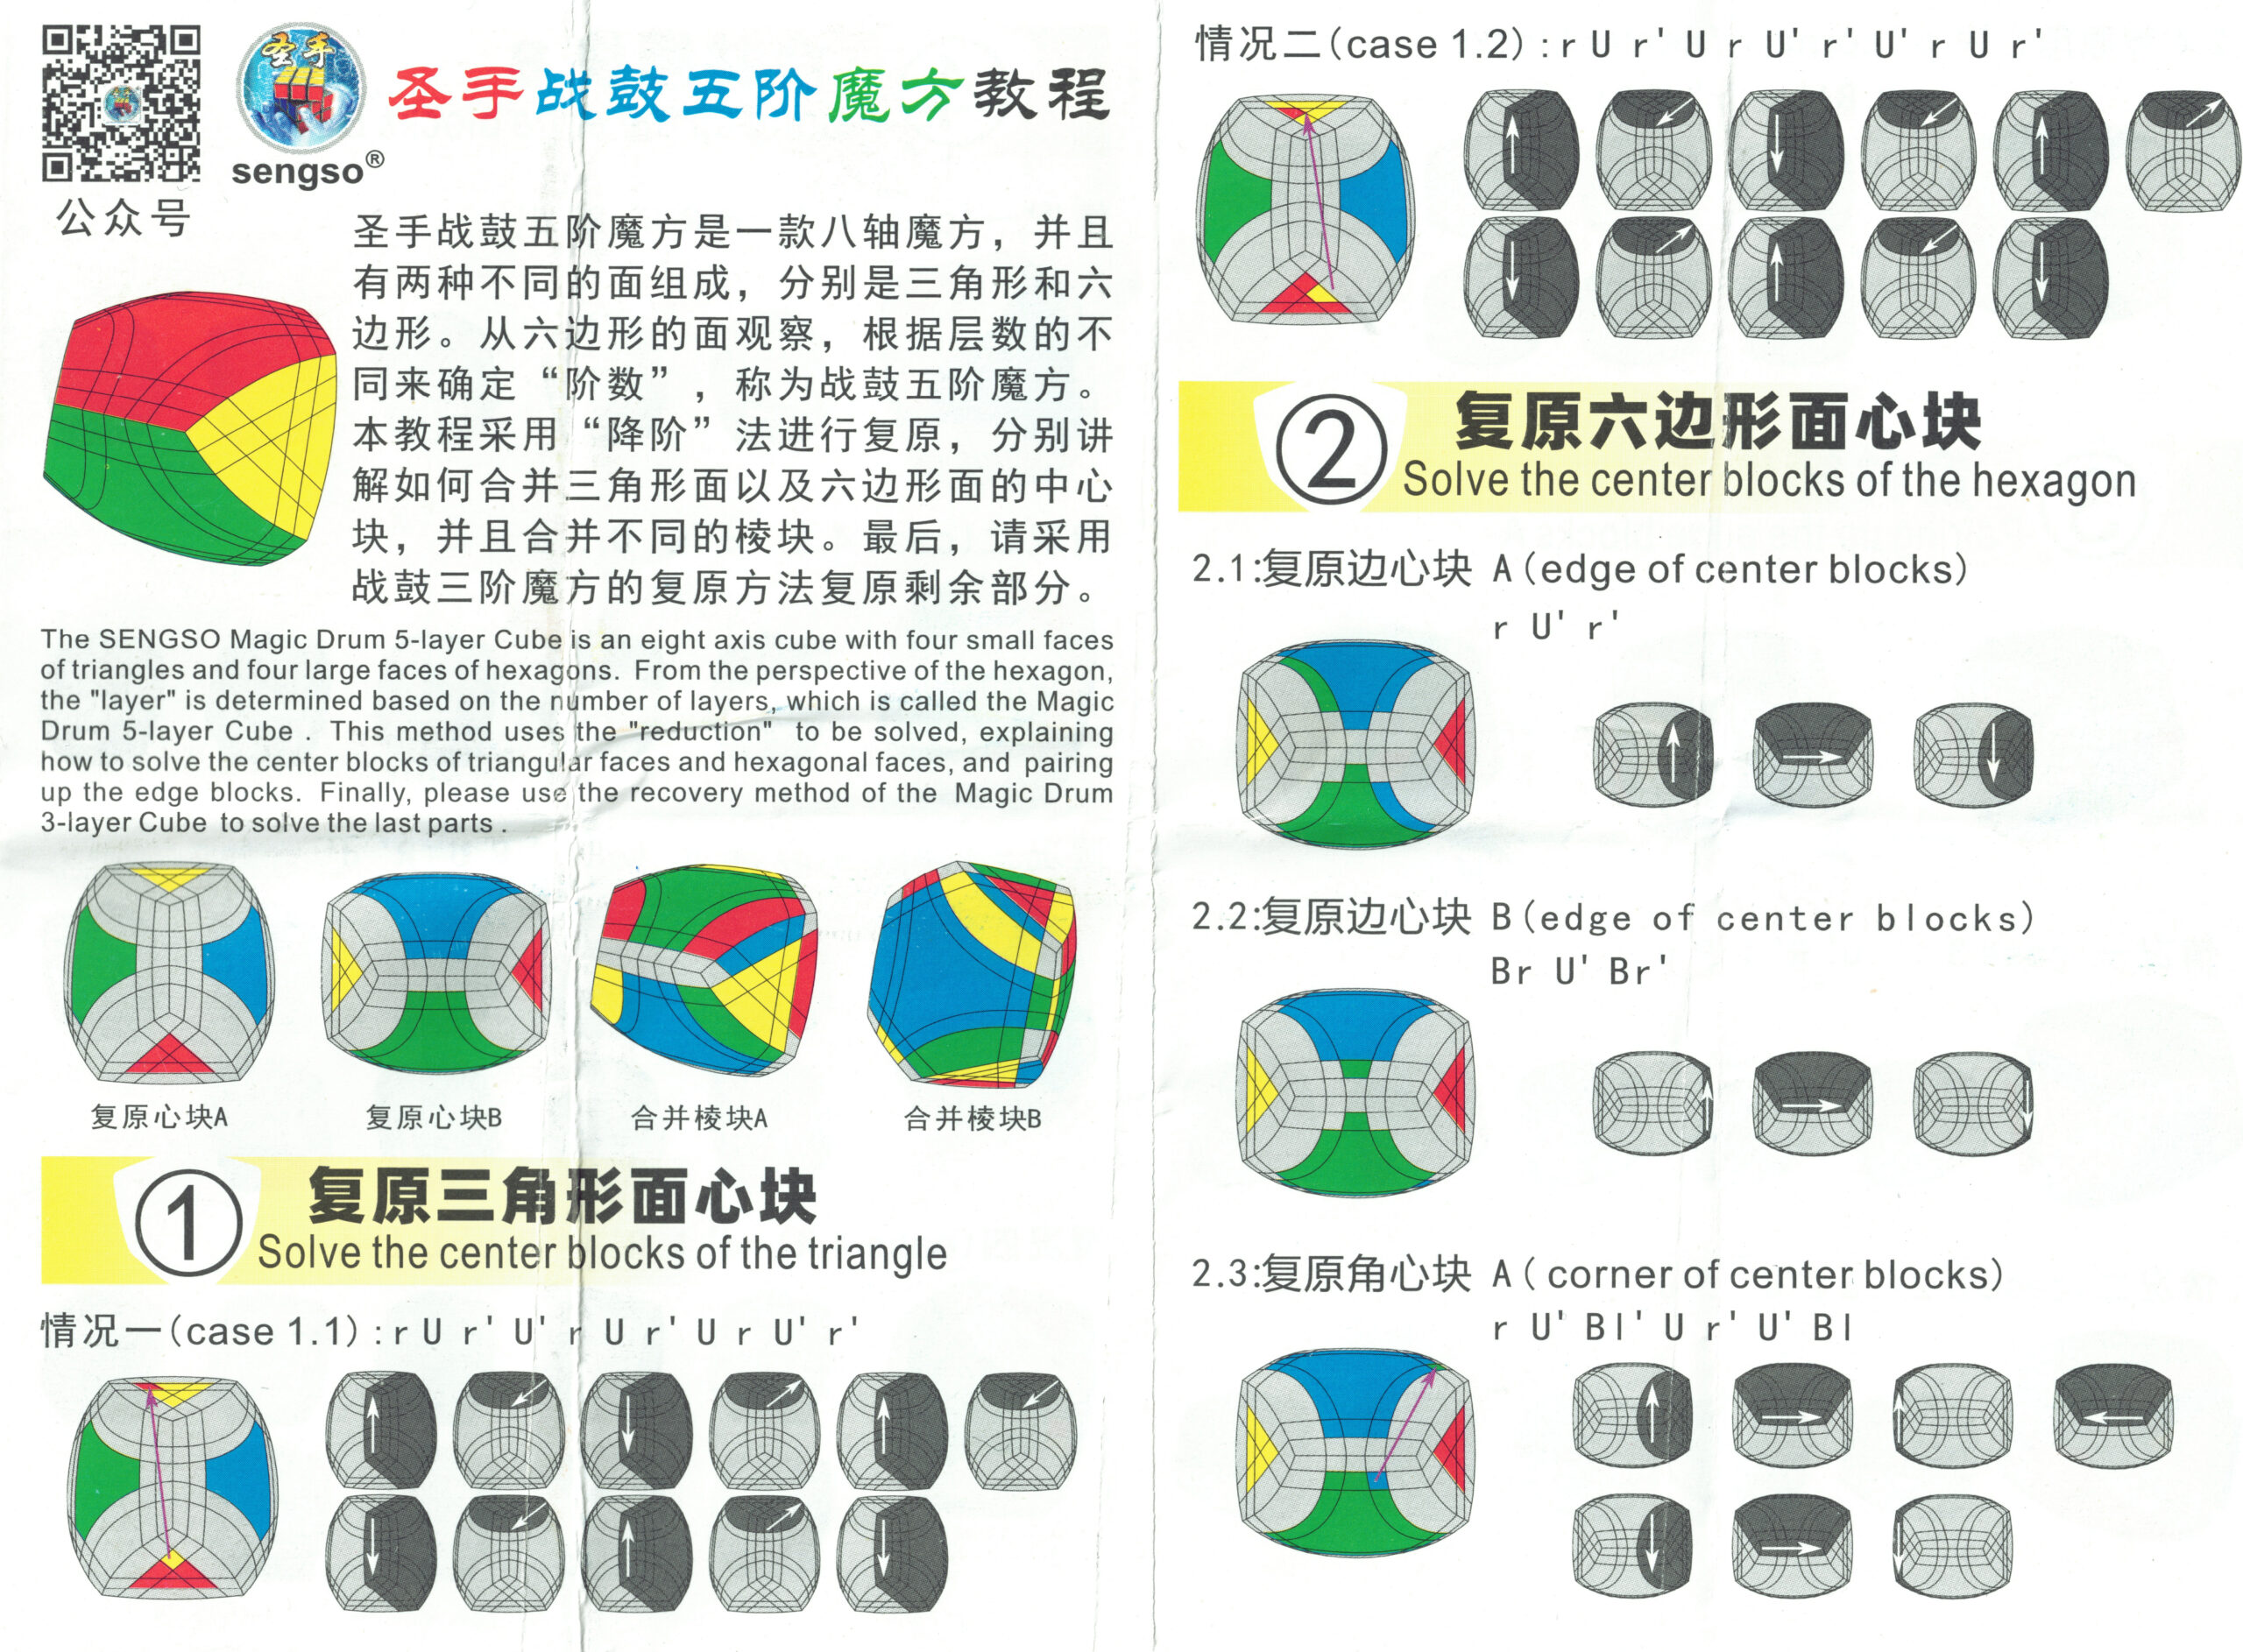
This puzzle is a simple, light, addition to my collection. Sengso is putting out a lot of these lately and I’m quite enjoying them. While the first steps of this solve are simple (it just requires 3x3x2 algorithms), the last layer needs some more finesse. So, here’s what you need to know to solve the 7 Axis, pentagonal-shaped puzzle.
Step 1: Solve first-two layers
Step 2: Solve Last-Layer Edges (Three-Cycle)
With a flat side facing you, this swaps the L, R and BL edges. This retains the F and BR edges.
 |
Clockwise:
Counter-Clockwise:
|
If you have adjacent edges correct, place one of those in the BR position. This ensures you’ll have one correctly-placed piece and means you’ll be doing this algorithm twice. Figure out which piece needs to move so that the second time you do this, it’ll solve all edges.
Step 3: Solve Last-Layer Corners
This is also a three-cycle. There are two different forms, however:
| Case 1: FL, FR, B corners (Triangle) | |
 |
Clockwise: * BR, R, L, U, L, U’ * R, U, L, U’, L, BR Counter-Clockwise: |
| Case 2: FL, FR and BL corners (B & BR safe) | |
|
Clockwise:
Counter-Clockwise:
|
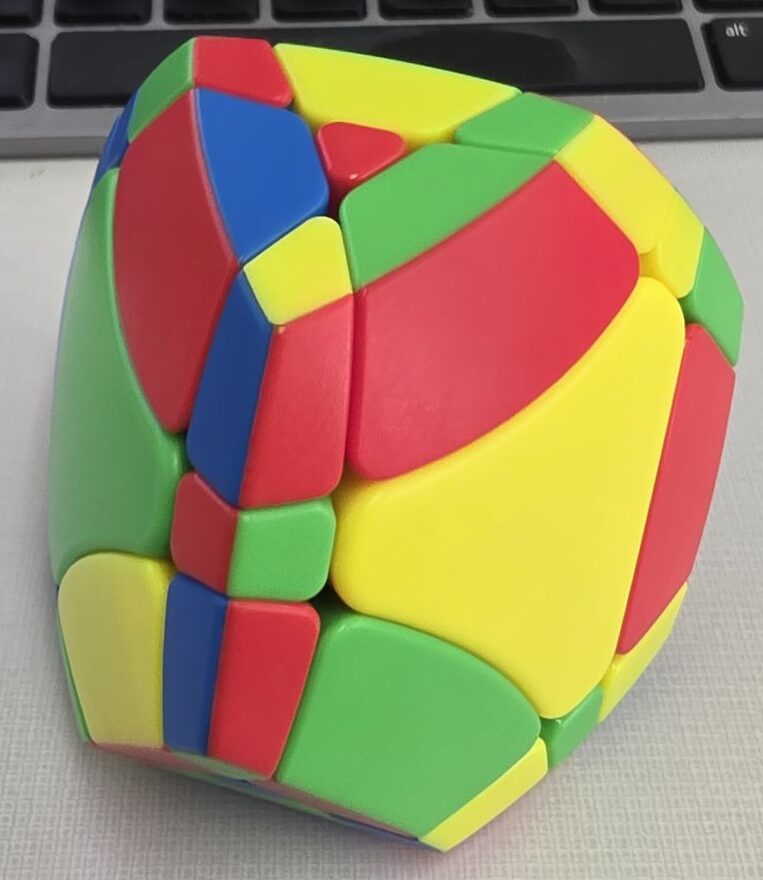
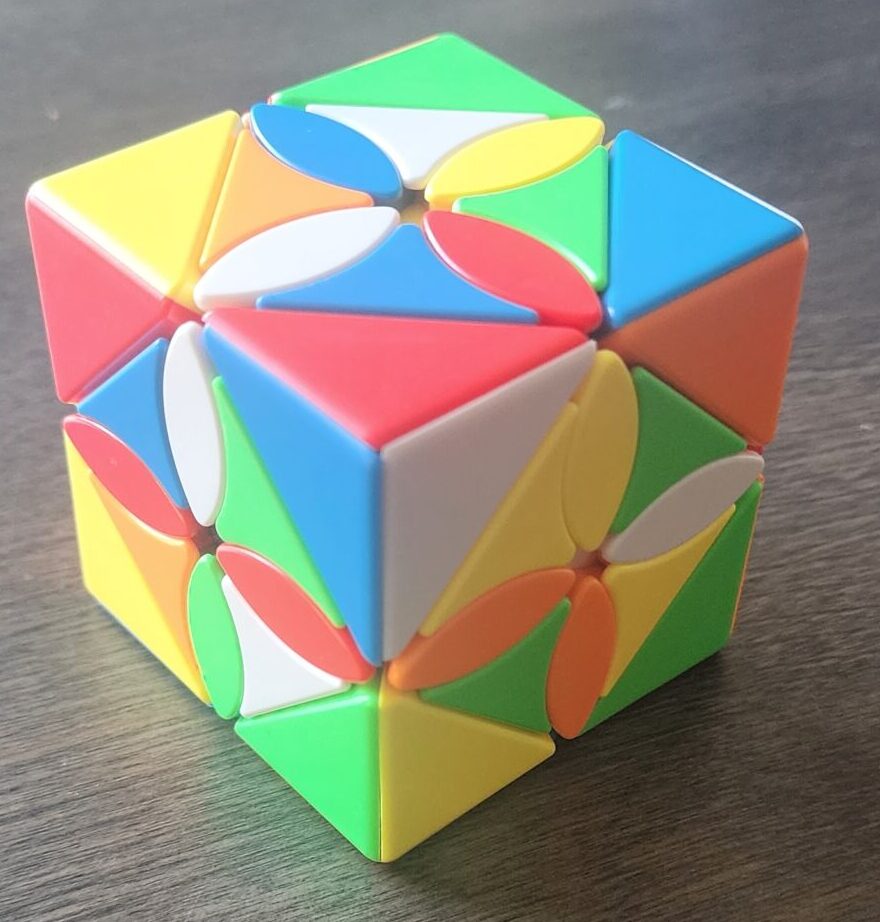 This puzzle is a mostly-straightforward solve, but I got quite stuck at one certain point. It is similar to the Polaris Cube or Skewb Mixup in that you can’t do much without performing half-turns. That plus the fact that it’s a Skewb made the Skewb Mixup one of my lesser-liked puzzles, but this one is a bit more challenging. Here’s how I solved it, addressing the concern when we get to it.
Step One
For me, I got each center individually, but that became an issue with the final two centers. So, next time, I may instead just get the four triangles of each center. This would leave the petals to solve later. Remember, you can always see which side is which due to the colored plastic underneath.
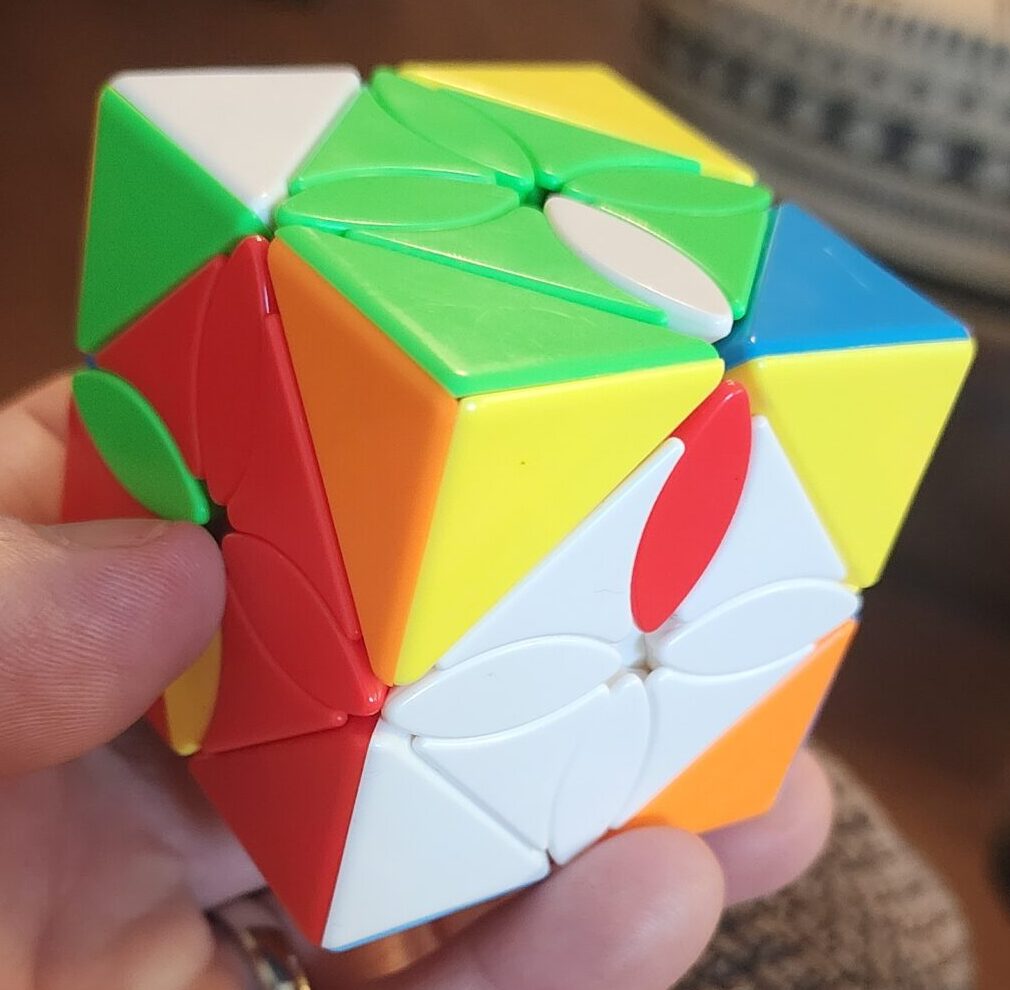
Step Two
Solve those petals. In this case, there’s an algorithm which will do a three-cycle. This maneuver will move the red petal –> green petal –> white petal – so a counter-clockwise of those positioned petals.
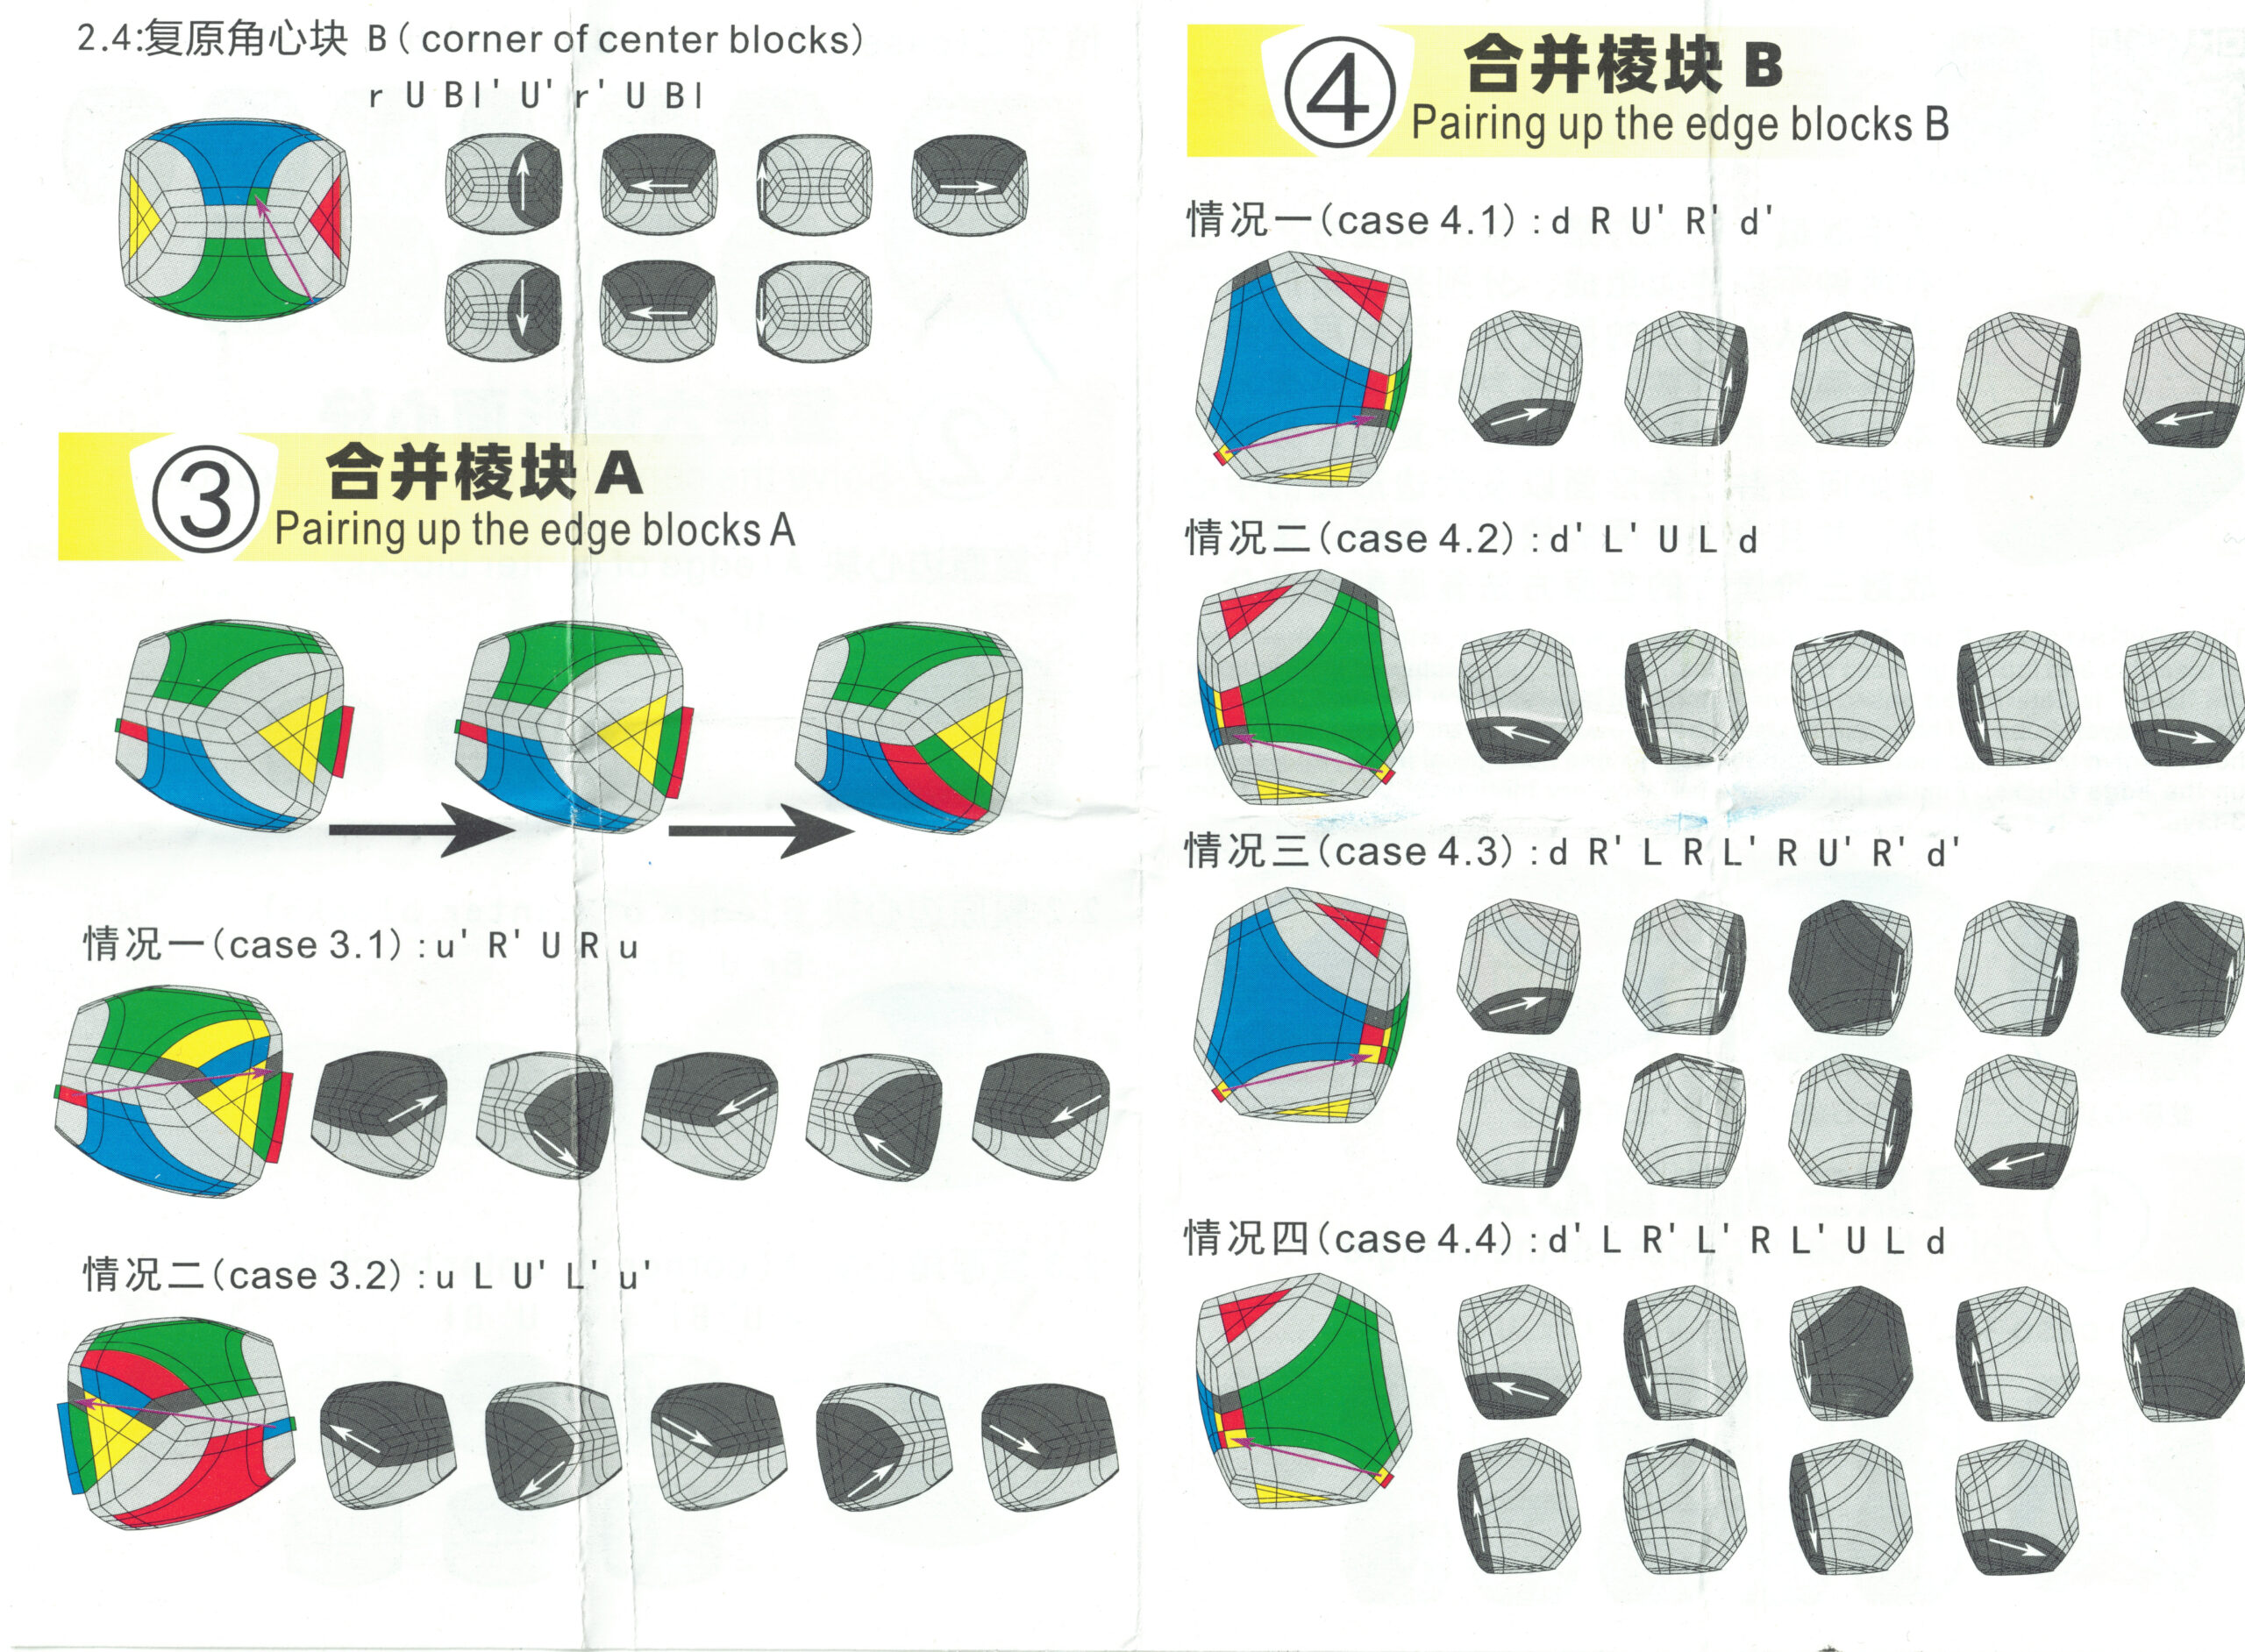
Of course, this can be done in reverse (L/L’/R/R’ (x2)) to do a counter clockwise swap.
As you get to the very end, you may need commutators to move things around.
Step Three
Solve a Skewb. Have you forgotten how?
EDIT: I had a far-too-complex solution here, but it turns out that for the two and three-layered versions, things are quite simple. I solved the four-layered and haven’t tried the five yet. For now, a quick refresher – which works just like a 3x3x2. (Tutorial help if you need it) Also, here’s the link to the Four-layered tutorial